How to Unclog a Spray Bottle Nozzle? Step by Step Guide!
To guarantee your spray bottle nozzle, start by unscrewing it from the bottle. Check for any visible debris and rinse the nozzle under warm water. If the blockage remains, soak it in a solution of equal parts water and vinegar for a few minutes.
Use a small needle or pin to gently poke through the nozzle opening, dislodging any stubborn residue. Rinse again with warm water.
Before reattaching, make sure it’s fully dry and clear of blockages. Reassemble your spray bottle and give it a test spray. Persisting issues might require deeper adjustments, offering even more ways to enhance performance.
Key Takeaways
Identify the Problem
To effectively fix your spray bottle, first determine if the nozzle is clogged, the trigger mechanism is broken, or if there are other issues hindering its performance. Start by checking the nozzle; it’s often the main factor. Look for any visible blockages or residue build-up.
If it appears clear, your next step is to examine the trigger. Press it to see if it springs back smoothly. If it sticks or feels sluggish, the issue might lie there.
Don’t forget to inspect the tube that draws the liquid up from the bottle; it can also become blocked or detached. Identifying the exact problem is essential; it ensures you’re addressing the right issue and helps you serve others more efficiently by restoring the tool’s functionality.
Gather Your Materials
- First, you’ll need to identify the necessary tools for the job, including tweezers, a needle, and perhaps a small brush.
- Next, source effective cleaning agents, such as rubbing alcohol or vinegar, which can help dissolve any residue within the nozzle.
Identify Necessary Tools
Before you start, make sure you have a needle or a thin wire, vinegar, and warm water on hand. These tools are essential for effectively unclogging the nozzle of your spray bottle.
You’ll also want to gather a few additional items to guarantee a smooth and successful cleaning process:
- Small bowl: To mix your cleaning solution.
- Soft cloth: For wiping down the nozzle and bottle.
- Tweezers: To remove any solid particles inside the nozzle.
- Plastic gloves: To protect your hands from cleaning solutions.
- Safety glasses: To shield your eyes from any potential splashes.
These tools aren’t just aids; they’re your partners in restoring functionality and serviceability to your spray bottles, ensuring you can continue serving effectively.
Source Cleaning Agents
Gather vinegar and warm water, essential agents for effectively cleaning and unclogging your spray bottle nozzle. You’ll need white vinegar due to its acidic properties that excel in breaking down mineral deposits and grime.
Mix a solution of equal parts vinegar and warm water. This blend is gentle yet effective, ensuring you don’t damage the nozzle’s components while restoring its functionality.
Ensure you have enough solution to thoroughly soak the nozzle; a small bowl should suffice for this purpose. Additionally, grab a soft toothbrush or a similar small brush for later steps; it’ll help you scrub off any stubborn residues without scratching the nozzle.
This preparation sets the stage for a successful unclogging process, tailored to serve anyone in need of a quick fix.
Prepare Work Area
Clear a space on your counter or table to make sure you have a clean, organized area for working on the spray bottle nozzle. It’s essential to have everything you need at hand, so you won’t be scrambling mid-process.
Here’s what you’ll gather:
- Warm water: Necessary for loosening any clog.
- Vinegar: Helps dissolve mineral deposits.
- Small bowl: For mixing your cleaning solution.
- Toothpick or needle: To poke through stubborn clogs.
- Soft cloth: For drying and wiping down the nozzle.
Disassemble the Spray Bottle
- First, you’ll need to identify the main components of your spray bottle, including the bottle itself, the nozzle, and the trigger mechanism.
- Next, carefully remove the nozzle by twisting it counterclockwise; make sure you’re gentle to avoid damaging any parts.
Identify Bottle Components
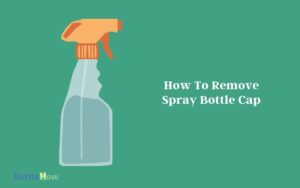
To disassemble the spray bottle, start by twisting off the nozzle head from the bottle’s neck. You’ll want to recognize each part to guarantee proper maintenance and reassembly. Be sure to keep track of the small components, such as the tube and spring, to avoid losing them. If you’re unsure how to remove spray bottle cap properly, check for any locking mechanisms or ridges that might require extra care. Gently pull apart the remaining pieces to ensure a smooth reassembly when you’re finished.
Here’s a quick rundown of the main components you’ll encounter:
- Nozzle Head: Where the spray actually emerges.
- Trigger Lever: You press this to activate the spray.
- Pump Cylinder: Mechanism that draws up the liquid when the trigger is pulled.
- Tube: Extends into the bottle to transport liquid to the nozzle.
- Bottle: Holds the liquid you’re spraying.
Understanding these parts helps you provide better care and maintenance, guaranteeing the bottle continues to function efficiently in your service to others.
Remove Nozzle Carefully
Now that you’re familiar with the parts of the spray bottle, let’s carefully remove the nozzle head to address any clogs.
First, make sure you’ve emptied the bottle of any liquid to prevent spills. Hold the bottle firmly with one hand and with the other, gently twist the nozzle head counterclockwise.
It’s important not to force it; if it feels stuck, apply a slight wiggling motion as you turn. This will help loosen it without causing damage.
Once the nozzle head is off, take a moment to inspect it. Look for any visible blockages or dirt that might be causing the issue.
You’re doing great; taking these steps ensures you can help others effectively by maintaining your equipment in top condition.
Separate Trigger Mechanism
With the nozzle head removed, you’ll next want to gently separate the trigger mechanism from the bottle’s neck. This step is important for ensuring you can thoroughly clean each component, preventing future clogs and ensuring the spray bottle continues to serve effectively.
Here’s how to proceed:
- Twist Gently: Rotate the trigger mechanism slightly to loosen its grip.
- Pull Upwards: Carefully pull the trigger upward, detaching it from the neck.
- Check for Seals: Look for any rubber seals and set them aside.
- Inspect for Damage: Examine the trigger for cracks or wear.
- Keep Parts Together: Place all parts on a clean cloth to keep them organized and ready for reassembly.
Carefully handling these parts ensures the longevity and effectiveness of your spray bottle, aiding in your mission to serve effectively.
Inspect the Nozzle
First, check the spray bottle’s nozzle for any visible blockages or dirt. It’s vital to look closely; sometimes, the smallest particle can disrupt the spray function.
Use a magnifying glass if necessary to make sure you don’t miss anything. If you find debris, gently tap the nozzle on a hard surface to dislodge it.
Next, examine the nozzle tip and the tiny opening where the spray exits. Debris often accumulates here. If it’s clear, also inspect the threads where the nozzle attaches to the bottle. Dirt can accumulate in these grooves and hinder the nozzle’s efficiency.
Rinse With Warm Water
After identifying a blockage in the nozzle, you’ll need to rinse it thoroughly with warm water.
Make sure the water’s not too hot to avoid damaging the nozzle’s components.
Gently apply the warm water to help dissolve and wash away any residue that’s causing the blockage.
Identify Nozzle Blockage
To identify a blockage in your spray bottle’s nozzle, start by rinsing it with warm water to loosen any debris. This initial step is important in ensuring that whatever is clogging the nozzle becomes softened or dislodged, making it easier to remove.
Here’s what you should focus on next:
- Inspect the nozzle: Look for visible signs of blockage.
- Check water flow: See if the water runs freely through the nozzle.
- Feel for irregularities: Sometimes, you can feel debris caught inside.
- Smell the nozzle: Odors can indicate bacterial growth.
- Test spray function: If water comes out unevenly or not at all, there’s likely a blockage.
These actions are geared towards efficiently restoring your spray bottle’s functionality to serve others effectively.
Apply Warm Water Rinse
Once you’ve identified a blockage, rinsing the nozzle with warm water can help loosen and remove the debris. Begin by detaching the nozzle from the spray bottle.
Hold it under a tap with warm, not hot, water. Let the water flow through the nozzle for about a minute, which will often dislodge any particles clogging the pathway.
If the blockage persists, fill a small bowl with warm water and immerse the nozzle for about 15 minutes. The warmth helps dissolve residues like oils or dried liquids that might be causing the blockage.
After soaking, give it another rinse under the tap to wash away any loosened material. This methodical approach ensures you’re effectively clearing the path for a fully functional spray bottle.
Soak in Vinegar Solution
Why not try soaking the clogged nozzle in a vinegar solution to dissolve mineral deposits? This method is especially effective if you suspect the blockage results from hard water or chemical buildup.
Here’s how you can do it effectively:
- Prepare a Solution: Mix equal parts of white vinegar and warm water.
- Disassemble: Remove the nozzle from the spray bottle.
- Soak: Submerge the nozzle in the vinegar solution.
- Timing: Let it sit for about an hour.
- Rinse: After soaking, rinse the nozzle thoroughly with warm water.
Use a Thin Wire or Needle
If soaking the nozzle in a vinegar solution hasn’t cleared the blockage, try using a thin wire or needle to remove any remaining debris.
Carefully insert the wire or needle into the nozzle’s opening. Gently wiggle it to loosen any particles that may be stuck inside. You’ll want to be thorough yet delicate to avoid damaging the nozzle’s interior.
Rotate the wire slightly as you push it deeper, ensuring you reach all sides of the nozzle passage. This method often dislodges stubborn residues that liquids can’t dissolve. Once you feel the wire move freely without resistance, carefully pull it out.
This should clear the pathway, allowing your spray bottle to function efficiently and continue serving its purpose effectively.
Reassemble and Test
After clearing the nozzle, carefully screw it back onto the spray bottle to guarantee a secure fit. Make sure that the nozzle is aligned correctly to prevent any leaks or malfunction when used. It’s important to test the spray bottle to confirm it’s working properly.
- Align Correctly: Position the nozzle to ensure it sprays efficiently.
- Check for Leaks: Inspect for any dripping or escaping liquid.
- Test Spray: Push the trigger to check for a consistent spray pattern.
- Adjust as Needed: Fine-tune the nozzle for the desired spray intensity.
- Listen for Airflow: Ensure there’s no blockage by listening for a steady airflow sound when spraying.
This methodical approach will help you serve others effectively by maintaining the functionality of your equipment.
Lubricate the Nozzle
Once you’ve confirmed that your spray bottle is fully functional, consider lubricating the nozzle to guarantee it continues to operate smoothly.
Start by selecting a suitable lubricant; a light silicone spray or mineral oil typically works best for this purpose. Avoid using thick oils or greases as they can attract more dirt and cause further blockages.
Apply a small amount of the lubricant directly onto the nozzle tip. You can also dab a bit on a cotton swab and gently apply it around the moving parts of the nozzle mechanism. Actuate the spray a few times to distribute the lubricant evenly within the system.
This simple step helps to prolong the life of your spray bottle, keeping it ready for effective use whenever it’s needed to serve others effectively.
Prevent Future Clogs
To prevent future clogs in your spray bottle, regularly clean and inspect the nozzle and its components. By taking proactive steps, you’ll guarantee that your tools are always ready to serve those who rely on them.
Here are five key practices to keep in mind:
- Use Distilled Water: Avoid tap water which can contain minerals that build up and cause blockages.
- Filter Additives: If adding substances, strain them to remove particulate matter that could clog the nozzle.
- Air Dry Completely: After cleaning, allow the nozzle and components to air dry thoroughly to prevent mold and residue buildup.
- Avoid Over-tightening: When reassembling, tighten components snugly without forcing, to avoid damage.
- Store Properly: Keep the bottle in a clean, dry place to prevent environmental contaminants from entering the nozzle.
Tips for Regular Maintenance
Regular maintenance of your spray bottle prolongs its lifespan and guarantees peak performance.
To make sure it’s always ready to serve, make it a habit to rinse the nozzle and bottle after each use, especially if you’re using solutions other than water. This prevents residue build-up.
Once a week, take apart the spray bottle components nozzle, straw, and trigger and soak them in warm, soapy water.
Use a small brush or a pipe cleaner to scrub the inside of the nozzle and straw, removing any hidden grime. Rinse all parts thoroughly under running water and allow them to air dry completely before reassembling.
Staying diligent with these steps will keep your spray bottle functional and reliable, always ready to assist.
Troubleshoot Persistent Issues
Despite your best efforts at maintenance, you might still encounter persistent issues with your spray bottle that require further troubleshooting.
When you’re faced with a nozzle that just won’t clear, consider these deeper steps to address the problem:
- Check for Hidden Cracks: Examine the nozzle for tiny, often overlooked cracks that could be affecting the spray mechanism.
- Inspect the Spring: Verify the spring inside the trigger isn’t damaged or misaligned, which can impede functionality.
- Test Water Quality: Hard water can leave residues that are tougher to clean; try using distilled water to identify if buildup is the issue.
- Adjust the Tube: Sometimes, the dip tube may need a slight adjustment or trimming.
- Seek Professional Help: If all else fails, consulting a professional may save time and further frustration.
Conclusion
Now that you’ve sailed through the steps of unclogging your spray bottle nozzle, it’s smooth sailing from here on out. Remember, regular maintenance is the key to keeping the nozzle as clear as a sunny day.
If persistent issues pop up, don’t hesitate to dissect the problem further. With your toolkit in hand and these troubleshooting tips, you’re well-equipped to keep any spray bottle in shipshape condition, ensuring a fine mist every time.

