How to Remove Spray Bottle Cap? Quick and Easy Steps!
To remove a spray bottle cap, grip the base of the nozzle and twist it counterclockwise. Be sure not to press the trigger while twisting. If the cap feels stuck, check for any locking mechanisms these often require a push, pull, or additional twist to disengage.
For tough caps, wrap a rubber band around the cap for extra grip or use slip-joint pliers, but remember to apply even pressure to avoid damaging the cap.
Heating the cap with a hairdryer or soaking it in warm water may also help by expanding the plastic slightly. Keep these tips in mind as you explore further techniques to guarantee successful cap removal without harm.
Key Takeaways
Understanding Spray Bottle Caps
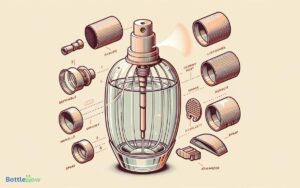
Spray bottle caps, often an important component of the bottle’s functionality, typically consist of a nozzle, a trigger mechanism, and a locking feature to control the spray.
Understanding these components is essential if you’re tasked with maintaining or repairing them. The nozzle directs the spray and can often be adjusted to control the spray pattern, from a fine mist to a direct stream.
The trigger mechanism initiates the spray action and usually works by compressing a small pump inside the bottle. The locking feature, important for safety and preventing accidental discharge, can usually be engaged by twisting or pressing down on the cap.
Recognizing these features helps you effectively use, troubleshoot, and service spray bottles, ensuring they meet the needs of those you’re supporting.
Basic Twist-Off Technique
To remove the cap from your spray bottle, firmly grip the base of the nozzle and twist it counterclockwise. This method, often referred to as the ‘essential twist-off technique,’ requires a steady hand and a bit of force. If the cap feels stuck, try using a rubber grip or a cloth for better traction. Once removed, you can follow the steps on how to refill Bona bottle by carefully pouring the cleaning solution into the opening without spilling. Ensure the cap is securely tightened back in place to prevent leaks during use.
It’s important to make sure you’re not applying pressure to the trigger while twisting, as this might lead to accidental spraying or damage to the mechanism. Check for any ridges or grooves on the cap, which are designed for a better grip, facilitating the removal process.
If the cap feels stuck, apply more pressure gradually; jerky movements can break the cap or nozzle. Remember, patience and a steady, continuous force are your best tools in effectively executing this task, ensuring you’re ready to serve efficiently and safely.
Handling Locking Mechanisms
Before attempting to remove a spray bottle cap, you’ll need to accurately identify the type of locking mechanism it employs. Various caps feature different opening techniques, which often require specific actions such as pressing, twisting, or aligning certain markers.
Understanding these details guarantees you can open the cap efficiently without causing damage to the bottle or mechanism.
Identify Cap Type
To begin with, identify if your spray bottle cap features a locking mechanism, which often appears as a small switch or twistable base. These are important for preventing accidental discharge or spillage.
Examine the cap closely; manufacturers often incorporate these safety features subtly. Look for any markings or instructions that might indicate the presence of a lock. These could be arrows, symbols, or text that points to how the mechanism functions.
If you’re dealing with a professional-grade or industrial spray bottle, the locking mechanism might be more robust, possibly requiring a specific method to engage or disengage.
Understanding the type of cap your bottle has is vital for effective and safe usage, especially when you’re aiming to serve others efficiently.
Unlocking Techniques Explained
Now that you’ve identified whether your spray bottle cap has a locking mechanism, let’s explore how to release it efficiently.
Most spray bottles feature a twist-and-lock mechanism, typically engaged by turning the nozzle to the left or right until you hear a click.
To release, gently turn the nozzle in the opposite direction usually marked by arrows indicating ‘open’ or ‘close’. It’s important to apply a balanced force; too much might damage the mechanism.
For push-and-twist caps, press down on the cap and simultaneously twist. This action disengages the lock, allowing the cap to spin freely.
Remember, patience and a steady hand are your best tools here. Don’t rush; a methodical approach ensures the longevity of your spray bottle.
Tools for Cap Removal
Using the right tools can greatly simplify the process of removing a spray bottle cap. You’ll need a pair of slip-joint pliers. These allow you to grip the cap securely without damaging it.
Place the pliers around the cap, adjusting the jaws to fit tightly. Gently twist counterclockwise; this should loosen the cap enough for you to unscrew it by hand.
If the cap is particularly stubborn, consider using a rubber strap wrench. It offers a vital grip and prevents slippage, which is essential when dealing with slick surfaces.
Wrap the strap around the cap, pull it taut, and then rotate it counterclockwise. This method ensures you’re applying force evenly, minimizing the risk of breaking the cap.
Safety Precautions
Prior to attempting to remove a spray bottle cap, prioritizing your safety is crucial. First, always wear protective gloves to shield your hands from any chemicals and to enhance your grip on the bottle and cap.
Additionally, make sure the area is well-ventilated and avoid inhaling directly from the bottle to prevent respiratory irritation.
Wear Protective Gloves
When handling a spray bottle for maintenance or repair, it’s crucial you wear protective gloves to prevent chemical exposure and enhance grip stability.
Gloves not only shield your skin from harmful chemicals but also prevent accidental slips, guaranteeing you can perform your task with confidence and safety. Opt for nitrile or neoprene gloves, as they offer excellent chemical resistance and are durable for such tasks.
Here’s a quick guide to choosing the right gloves:
| Material | Benefits | Recommended Use |
|---|---|---|
| Nitrile | Chemical resistant, puncture resistant | Handling most solvents |
| Neoprene | Versatile chemical resistance | Oils, acids, alcohols |
| Latex | Good tactile sensitivity | Not recommended due to possible allergies |
Always check the glove’s material against the specific chemicals in your spray bottle to ensure maximum protection.
Ventilate Work Area
Why should you guarantee your workspace is well-ventilated while working with spray bottles?
Proper ventilation is essential to dissipate potentially harmful vapors that could accumulate during the use or maintenance of spray bottles.
To begin with, identify an area with good airflow, preferably near windows or exhaust systems. Open windows or turn on fans to enhance circulation, ensuring that fresh air can move freely.
If you’re in a confined space without natural ventilation, consider using mechanical ventilation devices such as air movers or exhaust fans.
This isn’t just about comfort; it’s about maintaining a safe environment to prevent the build-up of fumes that can be hazardous over time.
This proactive approach supports a safer workspace, aligning with your commitment to service and safety.
Avoid Direct Inhalation
Having established the importance of good ventilation, it’s equally important to avoid directly inhaling the substances from spray bottles during use.
Here are practical steps to guarantee your safety:
- Wear a Mask: Use a mask or respirator to filter out harmful particles and vapors.
- Work at Arm’s Length: Keep the spray bottle as far away from your face as possible.
- Use a Fan: Position a fan to direct the airflow away from you.
- Brief Exposures: Limit the time you spend spraying and take breaks in fresh air.
- Read Labels: Understand the risks by reading product labels and MSDS for safety instructions.
These precautions will help safeguard your health while you serve others by maintaining a safe environment.
Troubleshooting Common Issues
If your spray bottle cap sticks or won’t budge, a few simple techniques can often resolve the issue effectively. Understanding the mechanics and potential problem areas can save you time and frustration.
Here’s a straightforward guide to help you troubleshoot common issues with spray bottle caps:
| Issue | Possible Cause | Solution Suggestion |
|---|---|---|
| Cap not rotating | Over-tightened or debris | Gently twist, clean threads |
| Spray not functioning | Clogged nozzle | Soak in warm water, clear blockage |
| Leaking from cap | Damaged seal | Replace the seal or cap |
| No suction | Air leak in cap | Make sure cap seals tightly |
| Irregular spray | Wear in spray mechanism | Consider replacing the bottle |
These steps should guide you through resolving typical issues efficiently and effectively.
Dealing With Stuck Caps
When you encounter a cap that’s stuck, initially try warming techniques to expand the plastic slightly, making it easier to twist off.
If heat doesn’t do the trick, you’ll need to employ physical manipulation; using rubber gloves can give you the extra grip needed to turn the cap.
These methods are practical and can save you from damaging the spray bottle or the cap itself.
Warming Techniques
Applying gentle heat can effectively loosen a spray bottle cap that’s stuck due to residue buildup or contraction. When you’re dealing with such an issue, remember that precise, gentle warming is key to avoiding damage to both the spray bottle and the cap.
Here are practical steps to follow:
- Use a hairdryer: Set it on low heat and direct the airflow around the cap area.
- Warm water dip: Submerge the cap in warm water for a few minutes.
- Heating pad: Wrap it around the cap briefly.
- Hot cloth: Apply a hot, damp cloth directly to the cap.
- Warm compress: Use a gel pack heated in the microwave for a short time.
These methods should help the cap expand slightly, making it easier to maneuver without force.
Physical Cap Manipulation
After warming, you can now try physically manipulating the spray bottle cap by gripping it firmly and twisting slowly to see if it loosens.
If it remains tight, position a rubber band around the cap to enhance your grip and reduce the chance of slippage. This method provides extra leverage and prevents potential damage to the cap.
Should the cap still resist, consider using a strap wrench. Wrap the tool around the cap, ensuring it’s snug but not overly tight to avoid cracking the plastic. Carefully apply even pressure while turning.
This tool can greatly increase your torque, making it easier to overcome even the most stubborn caps. Remember to work patiently and maintain steady force to avoid damaging the spray bottle.
Tips for Preventing Damage
How can you remove a spray bottle cap without causing damage to the nozzle or cap itself? It’s important to approach this task with care, using the right techniques to make sure you don’t compromise the functionality of your spray bottle.
Here are some essential tips:
- Use the right tools: Opt for pliers with rubber grips to avoid scratching or deforming the cap.
- Apply even pressure: Gently squeeze the cap, distributing pressure evenly to prevent cracking.
- Warm up the cap: Briefly run the cap under warm water to make it more pliable and easier to remove.
- Rotate slowly: Turn the cap slowly to ease it off without stressing the plastic.
- Check for defects: Before attempting removal, inspect the cap for any cracks or weaknesses which could lead to breakage.
Cleaning and Maintenance
Once you’ve successfully removed the spray bottle cap, regular cleaning and maintenance will guarantee its continued effectiveness. Start by rinsing the cap under warm water to dislodge any visible debris.
For a deeper clean, soak it in a solution of mild dish soap and warm water for about 10 minutes. If there’s a buildup of residue inside the cap, use a small brush or a toothpick to gently scrub it away. Rinse thoroughly under running water to remove any soap traces.
To disinfect, consider a quick dip in a solution of water and vinegar, which effectively kills germs without harsh chemicals. Let the cap air dry completely on a clean cloth to prevent any moisture buildup, which can lead to mold or bacterial growth.
Reassembling the Spray Bottle
Make sure all components are clean and dry before you start reassembling the spray bottle.
Here’s a straightforward guide to help you put it back together efficiently:
- Attach the Dip Tube: Insert the dip tube into the spray head. Make certain it’s firmly seated.
- Secure the Spray Head: Align the spray head with the bottle neck. Twist clockwise until tight.
- Check the Nozzle: Verify that the nozzle is correctly set to your desired spray pattern.
- Test the Trigger: Gently press the trigger to ensure it springs back. This checks the assembly’s functionality.
- Inspect for Leaks: After assembling, fill with a little water and spray to test for any leaks.
You’re now ready to use your spray bottle effectively!
Alternative Uses for Spray Bottles
Spray bottles, versatile tools in any household, can be repurposed for a variety of practical applications beyond simple cleaning tasks.
You can use them to mist plants, ensuring they receive the right amount of water without over-saturation. Fill them with diluted essential oils to create a natural air freshener or linen spray that promotes a calm, welcoming environment.
If you’re into gardening, mix water with natural pest deterrents like neem oil and use the spray bottle to protect your plants.
They’re also perfect for hairstyling, allowing you to dampen hair evenly before cutting or styling.
For those who paint, a spray bottle can help achieve a watercolor effect or manage the consistency of acrylics.
Each application aids in creating a more efficient, comfortable living space.
Conclusion
You might worry that tinkering with your spray bottle could break it, but with the right technique, it’s a breeze.
Always prioritize safety, using the appropriate tools and handling methods discussed.
Regular cleaning and proper reassembly guarantee your spray bottle works smoothly for various tasks.
Remember, a well-maintained spray bottle isn’t just a tool—it’s a versatile helper in your cleaning arsenal.
So, don’t hesitate to apply what you’ve learned; your spray bottle is ready for the challenge.

