How to Remove Logo From Stainless Steel Water Bottle
To remove a logo from your stainless steel water bottle, first gather acetone, a clean cloth, nitrile gloves, and safety goggles. Work in a well-ventilated area.
Test a small area with acetone to verify no damage. Dampen the cloth with acetone and gently rub the logo in circular motions.
Rinse thoroughly. Alternatively, mix a baking soda paste and scrub.
For stubborn logos, use fine-grit sandpaper, applying even pressure, or a heat gun set to 300–400°F, moving continuously to avoid overheating. Clean residue with isopropyl alcohol and buff with a microfiber cloth.
Ready for step-by-step guidance?
Key Takeaways
- Test a small area first with acetone to ensure no damage to the stainless steel surface.
- Dampen a cloth with acetone and gently rub the logo area in a circular motion.
- Use a baking soda paste and gently scrub the logo area with a soft cloth or sponge.
- Apply even pressure using sandpaper in a circular motion, periodically checking progress to avoid over-scratching.
- Remove adhesive residue with isopropyl alcohol and a soft cloth, then buff with a stainless steel cleaner for a clean finish.
Gather Your Materials
To start, make sure you have acetone, a clean cloth, protective gloves, and a well-ventilated workspace ready.
Acetone is a vital solvent capable of breaking down the adhesive or paint in the logo.
A clean cloth ensures there's no contamination during the process.
Protective gloves are essential to prevent skin contact with acetone, which can cause irritation.
Ensuring your workspace is well-ventilated will mitigate inhalation risks associated with acetone fumes.
Place all materials within easy reach, and double-check that you're in an area with good airflow.
Proper preparation is important for a smooth and safe removal process.
Safety Precautions
When removing a logo from a stainless steel water bottle, always wear protective gear like gloves and safety goggles to guarantee chemical exposure.
Make sure you work in a well-ventilated area to avoid inhaling any fumes.
Handle all chemicals with care, following the manufacturer's instructions to prevent accidents and ensure a safe process.
Wear Protective Gear
Always wear gloves and safety goggles to protect your skin and eyes from potential chemical splashes or debris.
Choose nitrile gloves for their resistance to chemicals, making sure they fit snugly to maintain dexterity. Safety goggles should wrap around to shield from all angles.
If using abrasive tools, consider adding a dust mask to prevent inhalation of particulate matter. Inspect your protective gear for any damage before starting.
Guarantee your workspace is well-lit to avoid accidents. Double-check that all materials and tools are within easy reach to minimize movement and potential exposure.
Work in Ventilated Area
Make sure your workspace has ample ventilation to prevent the accumulation of fumes and chemicals during the logo removal process. Open windows and use fans to create a cross-breeze, ensuring fresh air circulation. Proper ventilation minimizes inhalation risks and maintains a safe environment. Position your work area near an exhaust fan or in an open garage.
| Step | Emotion |
|---|---|
| Open windows | Relief and assurance |
| Use fans | Confidence and control |
| Work near exhaust | Safety and security |
Handle Chemicals Carefully
Wearing protective gloves and goggles is crucial to safeguard your skin and eyes from potential chemical splashes. When handling solvents or other harsh chemicals, always prioritize safety. Follow these steps to make sure you're protected:
- Wear Protective Gear:
Gloves, goggles, and a long-sleeved shirt are essential to prevent direct contact with the chemicals.
- Read Labels:
Carefully read and follow the instructions on the chemical labels for proper use and safety guidelines.
- Use in Ventilated Area:
Ensure the area is well-ventilated to avoid inhaling harmful fumes.
- Dispose Properly:
Dispose of used chemicals and materials in accordance with local hazardous waste disposal regulations.
Test a Small Area
Before committing to a full removal, apply your chosen solvent to a discreet area to verify it doesn't damage the stainless steel surface. Select an inconspicuous spot, like the bottom or a hidden side. Use a cotton swab to lightly dab the solvent onto the surface.
Observe any immediate reactions, such as discoloration or etching. Allow it to sit for a few minutes, then gently wipe it off with a clean cloth. Examine the area closely under good lighting. If the surface remains unscathed, proceed with the full application.
Always wear protective gloves and work in a well-ventilated area to guarantee your safety. This precautionary test helps prevent potential damage to your water bottle, ensuring a smooth logo removal process.
Using Acetone
To effectively remove the logo, dampen a clean cloth with acetone and gently rub the logo area in a circular motion. This method requires careful attention due to acetone's potent chemical properties. Always work in a well-ventilated area to avoid inhaling fumes.
Here's a quick guide to guarantee safety and efficiency:
- Wear gloves: Protect your skin from acetone's harsh effects.
- Test on a small area: Confirm the acetone doesn't damage the bottle.
- Use minimal acetone: Excess can harm the bottle's finish.
- Rinse thoroughly: After removing the logo, wash the bottle with soap and water.
Applying Baking Soda
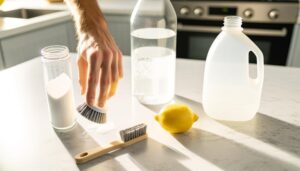
To start, mix a paste using baking soda and a small amount of water until it reaches a thick consistency.
Apply the paste directly to the logo area and gently scrub using a soft cloth or sponge.
Rinse thoroughly with water and inspect the surface to verify that the logo has been removed without damaging the steel.
Mix Baking Soda Paste
Start by mixing a thick paste of baking soda and water, making sure the consistency is thick enough to adhere to the stainless steel surface. To achieve the right mixture, follow these steps:
- Measure Ingredients: Use 2 tablespoons of baking soda and 1 tablespoon of water.
- Combine: Mix the baking soda and water in a small bowl, stirring until a uniform paste forms.
- Adjust Consistency: If the paste is too runny, add more baking soda; if too thick, add a few drops of water.
- Safety First: Wear gloves to avoid skin irritation and make sure you work in a well-ventilated area to avoid inhaling baking soda dust.
This method guarantees the paste will effectively prepare the surface for logo removal.
Apply to Logo Area
Carefully apply the baking soda paste directly onto the logo area, making sure full coverage to maximize its effectiveness in loosening the adhesive. Use a soft cloth or sponge to spread the paste evenly. Apply gentle pressure to avoid scratching the stainless steel surface.
| Step | Action |
|---|---|
| 1 | Scoop a small amount of paste onto a cloth |
| 2 | Spread paste over the entire logo |
| 3 | Use circular motions to work in the paste |
| 4 | Confirm the logo is fully covered |
| 5 | Let the paste sit for 15-20 minutes |
Always wear gloves to protect your skin from irritation. This method ensures the paste penetrates the adhesive, making it easier to remove the logo in subsequent steps.
Rinse and Inspect
Once the paste has set, rinse the area thoroughly with warm water to remove all traces of baking soda and loosened adhesive. Make sure you rinse every part of the treated area to prevent residue build-up.
Carefully inspect the surface for any remaining adhesive or logo remnants. If necessary, repeat the baking soda application process.
Follow these steps for a detailed inspection:
- Examine the surface under bright light to identify any leftover adhesive.
- Use a soft cloth to gently rub the area, checking for smoothness.
- Check corners and edges where adhesive may hide.
- Dry the bottle completely to make sure no water spots are left.
Rubbing Alcohol Method
To successfully remove a logo from a stainless steel water bottle using rubbing alcohol, first make sure you have a well-ventilated workspace and protective gloves. Dampen a cotton ball or cloth with rubbing alcohol and gently rub the logo until it begins to fade. If needed, repeat the process multiple times while applying steady pressure. Once the logo is removed, clean the surface with soap and water, and if you’re also wondering how to remove water bottle cap securely, ensure you twist it counterclockwise while gripping firmly.
Start by pouring a small amount of rubbing alcohol onto a clean, lint-free cloth. Gently rub the cloth over the logo, applying moderate pressure. The alcohol will begin to break down the adhesive or ink.
Continue to rub in a circular motion until the logo starts to fade and eventually disappears. If the logo persists, reapply the rubbing alcohol and repeat the process.
Once the logo is removed, rinse the bottle with warm water and mild soap to eliminate any alcohol residue. Dry thoroughly with a clean towel.
Sandpaper Technique
Utilize fine-grit sandpaper to methodically remove the logo from your stainless steel water bottle while ensuring you wear appropriate safety gear, such as gloves and eye protection. Begin by selecting a 400 to 600-grit sandpaper to avoid deep scratches.
Here's a step-by-step guide:
- Preparation: Clean the area around the logo with soapy water and dry it thoroughly.
- Sanding: Apply gentle, even pressure while sanding in a circular motion over the logo.
- Inspection: Periodically stop to inspect the progress, ensuring you're not over-sanding.
- Finishing: Once the logo is removed, switch to a higher grit (800-1000) to smooth the surface.
Heat Gun Approach
Start by setting your heat gun to a temperature between 300°F and 400°F to effectively soften the logo adhesive.
Hold the heat gun 2-3 inches away from the logo, moving it continuously to avoid overheating any single spot.
Always wear heat-resistant gloves and maintain proper ventilation to uphold safety throughout the process.
Correct Heat Gun Temperature
Setting your heat gun to approximately 300°F (150°C) guarantees that you apply enough heat to loosen the logo adhesive without damaging the stainless steel surface. Achieving this precise temperature is essential for effective removal.
Here's how you can confirm accuracy:
- Preheat the heat gun: Allow the heat gun to reach the desired temperature before applying it to the bottle.
- Test the temperature: Use an infrared thermometer to confirm the heat gun reaches 300°F (150°C).
- Maintain distance: Hold the heat gun about 2-3 inches away from the bottle to avoid overheating.
- Apply heat evenly: Move the heat gun in a consistent, circular motion to distribute heat uniformly.
Safe Handling Techniques
Once you've verified that your heat gun is at the correct temperature, make sure you're wearing protective gloves and safety goggles to shield yourself from potential burns or accidental exposure. Position the bottle on a stable, heat-resistant surface. Gradually apply the heat gun to the logo area, maintaining a distance of 2-3 inches. Move the heat gun continuously to avoid overheating any single spot.
| Step | Action | Safety Tip |
|---|---|---|
| 1 | Wear gloves and goggles | Prevent burns and eye injuries |
| 2 | Place bottle on heat-resistant surface | Avoid fire hazards |
| 3 | Apply heat gun at 2-3 inch distance | Prevent overheating |
Monitor the logo as the adhesive softens. Use a plastic scraper to gently peel the logo off, ensuring you don't scratch the surface.
Cleaning Residue
Make sure you thoroughly remove any adhesive residue left behind using a soft cloth dampened with isopropyl alcohol, applying gentle pressure to avoid scratching the stainless steel surface. Precision is key here.
Follow these steps to guarantee a clean finish:
- Dampen Cloth: Moisten a soft, lint-free cloth with isopropyl alcohol.
- Apply Pressure: Gently rub the residue area, ensuring even pressure to avoid damaging the surface.
- Wipe Clean: Use a separate dry cloth to wipe away any remaining alcohol and loosened residue.
- Inspect Surface: Examine the area to confirm all adhesive is removed, repeating the process if necessary.
Safety first: work in a well-ventilated area, and keep isopropyl alcohol away from open flames.
Final Touches
Guarantee the stainless steel water bottle achieves a polished look by applying a thin layer of stainless steel cleaner using a microfiber cloth. Gently buff the surface in circular motions to make certain of even coverage. Be sure to wear gloves to safeguard your skin from chemicals. Inspect the bottle under good lighting to confirm all traces of the logo are gone.
Here's a breakdown of the steps:
| Step | Description |
|---|---|
| Apply Cleaner | Use a microfiber cloth to apply a thin layer of cleaner. |
| Buff Surface | Gently buff in circular motions for consistent application. |
| Safety Precaution | Wear gloves to protect your skin. |
| Inspect | Check under good lighting to ensure logo removal. |
Finish by wiping the bottle with a clean, dry cloth.
Conclusion
You've now mastered the art of removing logos from your stainless steel water bottle. Whether you used acetone, baking soda, sandpaper, or a heat gun, you followed detailed methods and emphasized safety at each step.
Test a small area first, apply your chosen technique, and clean off any residue. With your bottle now logo-free, you're ready to enjoy a sleek, personalized look.
Remember, practice makes perfect, and safety always comes first. Well done!

