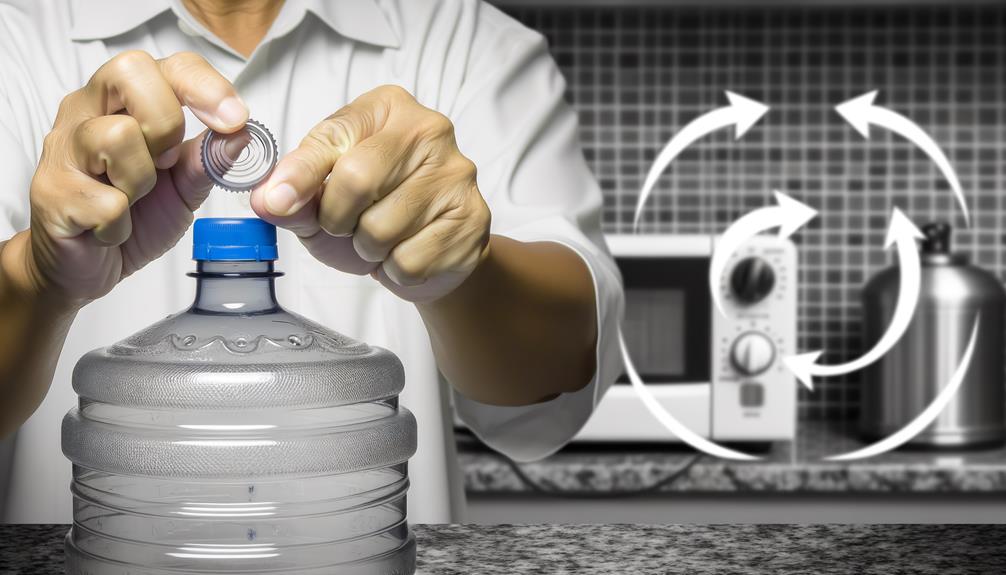
How to Remove Cap From 5 Gallon Water Bottle
To remove the cap from a 5-gallon water bottle, gather a bottle opener designed for large caps, a clean cloth, and work on a stable, flat surface. Inspect the cap for any tamper-evident seals or locking mechanisms.
Grip the bottle opener securely, position its prongs under the cap edge, and apply steady pressure to pry it off. Alternatively, you can use a rubber strap wrench or submerge the cap in hot water for 30 seconds to loosen it.
For stubborn caps, employ pliers and twist gently. To guarantee success, consider these essential steps and additional tips.
Key Takeaways
- Inspect the cap for tamper-evident seals, safety bands, or locking mechanisms that need removing.
- Secure the bottle on a stable, flat surface to prevent tipping during cap removal.
- Use a bottle opener designed for large caps to pry off the cap efficiently.
- Try a rubber strap wrench for improved grip and leverage on stubborn caps.
Gather Your Materials
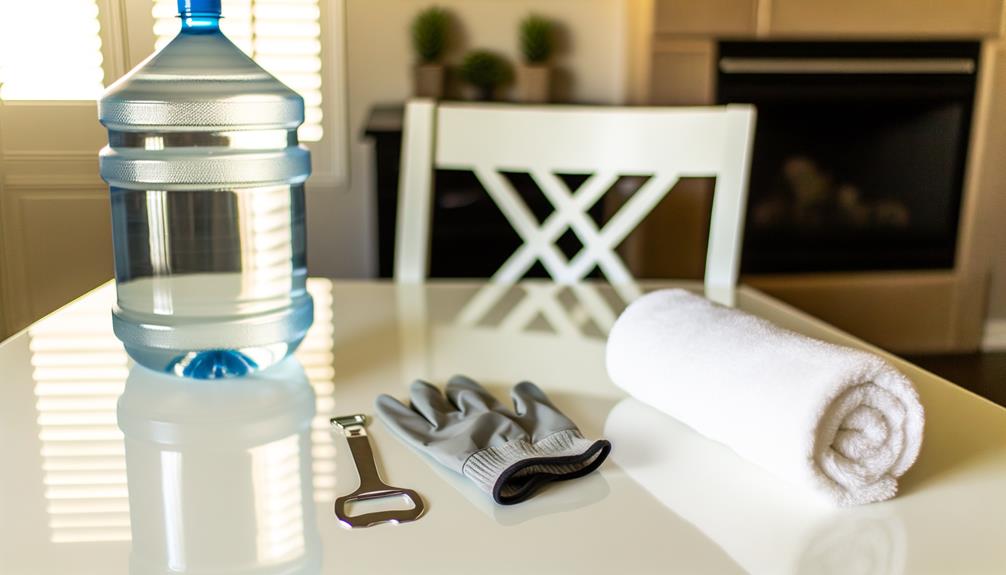
First, assemble all necessary tools, including a bottle opener, clean cloth, and a stable surface for the 5-gallon water bottle.
Make certain your bottle opener is specifically designed for large caps to guarantee efficiency and safety. The clean cloth will help you grip the bottle firmly, preventing any slips during the removal process.
Position the water bottle on a stable, flat surface to keep it steady; this minimizes the risk of spills and accidents. Double-check that your working area is free from clutter to maintain focus and safety.
Inspect the Cap
Examine the cap closely to identify any tamper-evident seals, safety bands, or locking mechanisms that could complicate removal.
Look for perforated lines, pull tabs, or plastic rings indicating the cap's security features. Make sure you understand how each element functions.
Some caps have a breakable seal that must be removed before twisting the cap off. Others may include a safety band that tears away as you unscrew the cap.
Take note of any arrows or instructions printed on the cap, as they can provide guidance on the proper method to remove it.
Understanding these features guarantees you don't damage the cap or bottle, and prevents spills.
Thoroughly inspecting the cap before attempting removal is essential for a smooth process.
Position the Bottle
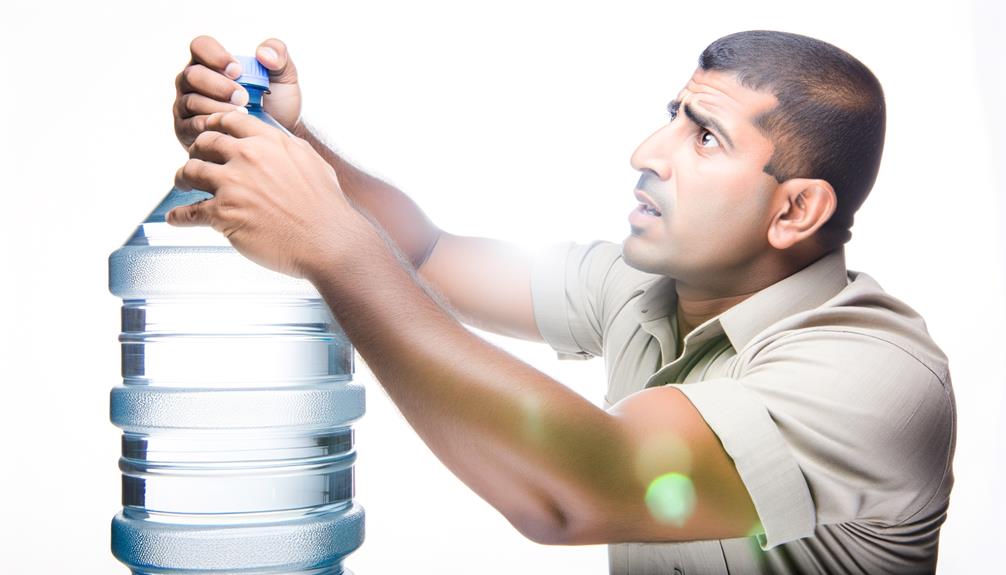
Make certain the bottle is placed on a stable, flat surface to prevent any accidental tipping or spilling during cap removal. Choose a location like a kitchen counter or table that can support the bottle's weight. Confirm the surface is dry to avoid slippage.
Position the bottle upright, with the neck facing upwards. Verify that there's enough clearance around the bottle to allow you to work comfortably. Stand directly in front of the bottle to maintain balance and control.
If necessary, secure the bottle by holding it firmly with one hand at the top, near the neck. By doing so, you'll minimize movement and guarantee a smooth cap removal process. Proper positioning is essential for safety and efficiency.
Use a Bottle Opener
Using a bottle opener specifically designed for 5-gallon water bottles guarantees a safe and efficient cap removal process. First, you should firmly grip the bottle opener's handle, assuring you have a strong hold. Next, position the opener's prongs under the edge of the cap. Apply steady pressure while lifting the handle upwards to pry off the cap. This method minimizes the risk of spillage and assures the cap comes off cleanly.
| Step | Action | Outcome |
|---|---|---|
| 1 | Grip the bottle opener firmly | Secure handling |
| 2 | Position prongs under the cap | Proper alignment |
| 3 | Lift handle to pry off cap | Smooth, clean cap removal |
Using the correct tool makes the task straightforward and reduces potential strain.
Try a Rubber Strap Wrench
A rubber strap wrench offers a versatile and effective solution for loosening the cap on a 5-gallon water bottle. To use it, wrap the rubber strap around the bottle cap and secure it tightly. The strap wrench provides a firm grip without damaging the cap or bottle.
Here's why a rubber strap wrench works well:
- Non-marring grip: The rubber material grips firmly without scratching or damaging the bottle cap.
- Adjustable size: It can be adjusted to fit various cap sizes, ensuring versatility.
Employ Hot Water Technique
When dealing with a particularly stubborn cap, you can employ the hot water technique to soften the plastic and make removal easier.
Begin by boiling water and carefully pouring it into a container large enough to submerge the cap. Verify you don't overfill the container to avoid spills.
Submerge the cap in the hot water for approximately 30 seconds, allowing the heat to soften the plastic. After 30 seconds, remove the bottle from the water and immediately attempt to twist off the cap using a towel or cloth for additional grip.
The heat should make the plastic more pliable, facilitating easier removal. Be cautious of hot surfaces and water to avoid burns or injuries during this process.
Utilize Pliers if Needed
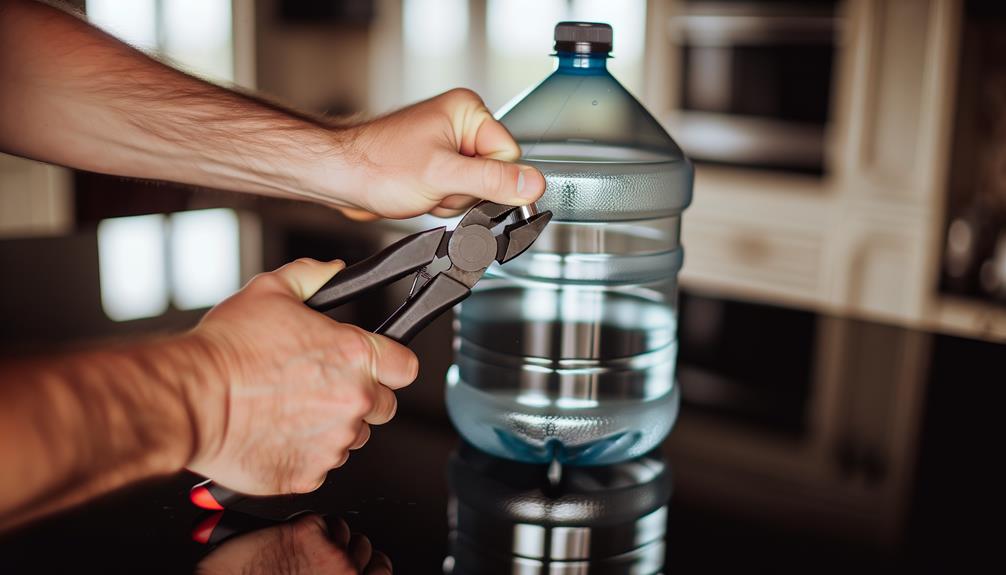
Should the cap remain stubborn, grasp a pair of pliers for additional leverage.
Position the pliers securely around the cap's edge to avoid slippage. Gently, but firmly, twist the pliers counterclockwise to loosen the cap. Confirm even pressure to prevent any damage to the cap or bottle.
- Select appropriate pliers: Opt for slip-joint or adjustable pliers for the best grip.
- Protect the cap: Place a cloth between the cap and pliers to cushion and avoid scratches.
This method should facilitate the removal of the cap without causing unnecessary strain or damage, confirming a smooth and efficient process.
Clean Up and Store
After successfully removing the cap, thoroughly clean any tools used and confirm the work area is free of spills or debris. Use a mild detergent and warm water to wash pliers or any other equipment. Dry them completely to prevent rust. Discard the old cap appropriately. Next, focus on storing your tools and the now open water bottle properly. Store tools in a dry, organized place to keep them in prime condition. Keep the water bottle sealed with a new cap or cover to maintain water purity. Here's a quick reference table:
| Task | Method | Tools Needed |
|---|---|---|
| Clean tools | Mild detergent, warm water | Pliers, cloth |
| Dry tools | Air dry or towel dry | Clean towel |
| Discard old cap | Dispose of responsibly | Trash bin |
| Store tools | Dry, organized place | Toolbox or drawer |
Following these steps confirms a clean and efficient workspace.
Conclusion
Removing a cap from a 5-gallon water bottle may seem challenging, but with the right tools and techniques, it’s straightforward. One effective method is to use a bottle opener or a flat-head screwdriver to pry the cap off carefully. If the cap is tightly sealed, applying gentle pressure while twisting can help loosen it. Additionally, learning simple maintenance tasks like how to replace Brita filter can make managing your water supply more convenient.
For instance, Jane once struggled with a particularly stubborn cap until she used a rubber strap wrench, which provided the necessary leverage.
Always inspect the cap first and choose the appropriate method, whether it's a bottle opener, hot water, or pliers.
After successfully removing the cap, don't forget to clean up and store your tools properly.