How to Keep Stickers on a Water Bottle? Easy Guide
To keep stickers on your water bottle, choose high-quality, waterproof vinyl stickers. Clean the bottle with warm water and mild soap, then dry it completely with a lint-free microfiber cloth.
Plan your sticker placement beforehand for best adhesion. When applying, press down from one edge to the other, using a flat tool to smooth out any air bubbles.
Protect the stickers with a clear sealant like acrylic spray or Mod Podge, and let it dry completely. Regularly reapply the sealant and handle the bottle carefully to prevent damage.
Stick around to master more advanced techniques.

Key Takeaways
- Choose high-quality vinyl stickers with strong adhesive and waterproof features.
- Clean and dry the bottle thoroughly before sticker application to ensure optimal adhesion.
- Plan sticker placement on flat surfaces and apply carefully to avoid air bubbles.
- Use a protective sealant like clear acrylic spray to safeguard stickers from water damage.
Choose High-Quality Stickers

To guarantee your stickers stay adhered to your water bottle, start by selecting high-quality stickers that are specifically designed to withstand moisture and frequent handling.
Look for vinyl stickers with a strong adhesive backing. These stickers often have a protective laminate layer, which enhances durability and prevents fading.
Ascertain the stickers are labeled as waterproof or water-resistant, as these properties will keep them intact even when exposed to water.
Check user reviews and product descriptions for terms like ‘UV-resistant‘ and ‘scratch-proof,’ which indicate longevity.
Opt for stickers from reputable brands known for quality. Avoid paper-based stickers, as they deteriorate quickly when wet.
Clean the Surface Thoroughly

Before applying your stickers, make certain the water bottle’s surface is meticulously cleaned to remove any dirt, oil, or residue. Follow these steps to guarantee ideal adhesion:
- Wash: Use warm water and mild dish soap. Scrub the bottle with a soft sponge to eliminate any grime.
- Rinse: Thoroughly rinse the bottle under running water to wash away all soap traces. Incomplete rinsing can leave residue that affects sticker adhesion.
- Wipe: Use a lint-free microfiber cloth to wipe the surface. This prevents any remaining particles from interfering with the sticker’s adhesive.
These steps guarantee a clean, residue-free surface, essential for long-lasting sticker application.
Dry the Bottle Completely

After cleaning, make sure you towel dry the bottle thoroughly to remove visible water droplets.
Use compressed air to eliminate any moisture in hard-to-reach areas, such as around the cap and seams.
Make certain there’s no residual moisture, as any dampness can compromise the adhesive strength of the stickers.
Towel Dry Thoroughly
Using a clean, lint-free towel, make certain you dry the bottle completely, paying special attention to any crevices or textured areas. This step is essential to guarantee adhesive bonds ideally.
Follow these steps:
- Surface Inspection: Run your fingers along the bottle’s surface to identify any lingering moisture.
- Detail Drying: Focus on drying the bottle’s neck, base, and any grooves, as these areas tend to trap water.
- Final Wipe: Use a fresh section of the towel to give the bottle one last thorough wipe.
Avoid using paper towels as they can leave fibers behind, compromising the sticker’s adhesion.
Confirming your bottle is entirely dry will greatly improve the longevity and appearance of your stickers.
Use Compressed Air
To guarantee every last bit of moisture is eliminated, apply compressed air to the bottle, concentrating on hard-to-reach areas.
First, hold the canister upright to secure ideal air pressure. Direct the nozzle towards seams, crevices, and any intricate designs on the bottle. Use short bursts of air, moving systematically around the bottle to cover all surfaces.
Pay special attention to the cap threads and the bottom rim, where water often hides. Tilt the bottle as needed to improve airflow and access hidden spots.
Verify the bottle feels completely dry to the touch after this process.
This meticulous drying method prevents any moisture from interfering with sticker adhesion, assuring they stay firmly attached for a long time.
Avoid Residual Moisture
Make certain that every part of the water bottle is thoroughly dried to avoid any residual moisture, which can compromise the adhesive strength of your stickers.
Follow these steps meticulously to guarantee ideal results:
- Hand Dry: Use a lint-free cloth to wipe down the bottle, focusing on every curve and crevice to remove visible moisture.
- Air Dry: Let the bottle air dry for at least 30 minutes in a well-ventilated area. This allows any remaining moisture to evaporate.
- Heat Application: Utilize a hair dryer on a low heat setting to eliminate stubborn moisture. Hold the dryer a few inches away, moving it continuously to avoid overheating any part.
Plan Sticker Placement

Before applying your stickers, visualize your design layout to guarantee a cohesive look.
Consider the bottle’s shape, focusing on curves and flat surfaces to maximize adhesion.
Group similar themes together to create a unified and aesthetically pleasing arrangement.
Visualize Design Layout
Start by arranging your stickers on a flat surface, allowing you to experiment with different configurations and visualize the final design before adhering them to your water bottle. This step guarantees a cohesive and aesthetically pleasing layout. You can mix and match various sizes, colors, and themes to create a unique composition that reflects your personality. If you’re looking for additional ways to personalize your bottle, consider exploring water bottle engraving ideas to complement your sticker arrangement. Combining stickers with engravings can create a layered, customized look that makes your bottle truly one-of-a-kind.
Follow these steps:
- Categorize Stickers: Group them by size, color, or theme. This makes it easier to balance the design.
- Create a Focal Point: Choose a standout sticker to place centrally or in a prominent position. This serves as the anchor for your design.
- Test Spacing: Adjust the gaps between stickers to avoid overcrowding or excessive empty space.
Consider Bottle Shape
When planning sticker placement, take into account the unique contours and curvature of your water bottle to guarantee an even and secure application.
Start by identifying flat or minimally curved areas where stickers will adhere best. Avoid heavily curved sections, as stickers may crease or peel.
Use a measuring tape to gauge the surface area, making certain your stickers fit without overlapping. For cylindrical bottles, align stickers vertically to maintain a cohesive look.
Gently press from the center outward to eliminate air bubbles. If your bottle has ridges or textured surfaces, opt for smaller stickers that can adapt to the uneven terrain.
Group Similar Themes
To create a visually appealing and cohesive design, group stickers by similar themes or color schemes before adhering them to your water bottle. Begin by laying out all your stickers and categorizing them. This step guarantees uniformity and harmony.
Follow these steps:
- Theme Categorization: Sort stickers into thematic groups, such as nature, travel, or motivational quotes.
- Color Coordination: Arrange stickers by color palette, making sure complementary hues are placed together for a balanced look.
- Spatial Planning: Use a temporary adhesive, like painter’s tape, to position stickers on the bottle. This allows for adjustments before final placement.
Apply Stickers Carefully
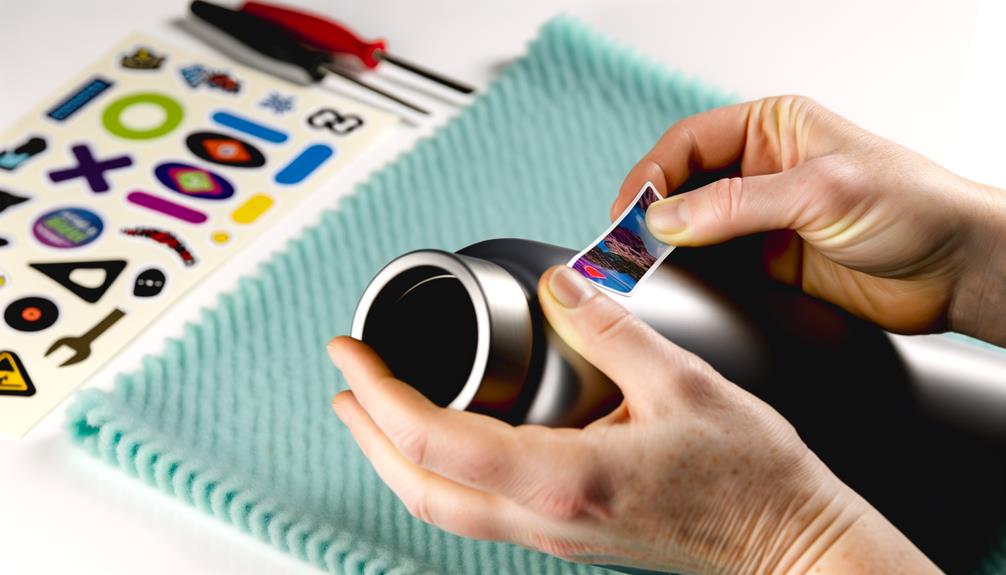
Make certain the surface of the water bottle is clean and dry before peeling the backing off the sticker.
Begin by aligning the sticker carefully with your desired placement. Hold the sticker by its edges to avoid touching the adhesive surface.
Gently position one edge of the sticker onto the bottle, making sure it’s straight. Slowly press the sticker down, moving from one edge to the other, applying firm, even pressure. This method reduces the risk of misalignment and guarantees optimal adhesion.
Use a flat tool like a credit card to press the sticker firmly, enhancing its bond with the bottle’s surface.
Smooth Out Air Bubbles

Eliminate air bubbles by starting from the center of the sticker and pressing outward in smooth, firm strokes. This guarantees the adhesive bonds evenly, reducing the likelihood of peeling. Use a small plastic card, like a credit card, for precise pressure.
Here’s a step-by-step guide:
- Center to Edge: Begin at the sticker’s center, using the card to apply pressure outward. This method pushes air bubbles to the edges.
- Edge Inspection: Once smoothed, inspect the edges. If any bubbles remain, lift the sticker gently and repeat the process.
- Final Press: Finally, press down firmly around the entire sticker perimeter to secure it.
Following these steps guarantees your sticker adheres perfectly to your water bottle, maintaining its appearance and durability.
Use a Protective Sealant

To guarantee your stickers stay firmly attached, start by choosing the right type of sealant, such as a clear acrylic spray or Mod Podge.
Apply an even coat of the sealant over the stickers, maintaining a consistent distance to prevent pooling.
Allow the sealant to dry completely, following the manufacturer’s recommended drying time for ideal adhesion.
Choosing Sealant Type
Selecting the right type of sealant guarantees your stickers remain firmly adhered and protected from water damage. To choose the best sealant, consider the following:
- Acrylic Sealant: Opt for an acrylic-based sealant for a clear, glossy finish. It’s water-resistant and ideal for maintaining the vibrant colors of your stickers.
- Polyurethane Sealant: This type offers exceptional durability and flexibility. It withstands both water and mechanical stress, confirming your stickers won’t peel or crack.
- Epoxy Sealant: Use an epoxy sealant for superior adhesion and a tough, resilient coat. It’s perfect for heavy-duty protection but can be more challenging to apply.
Assess your needs and match them to the sealant’s properties. This confirms your stickers stay intact and vibrant on your water bottle.
Application Best Practices
When applying a protective sealant, start by confirming the surface of your water bottle is clean and free of any dirt or oils to promote ideal adhesion. Use a mild detergent and water to clean the bottle, then dry it thoroughly. Next, apply the protective sealant evenly over the stickers, making sure to cover all edges to prevent peeling.
| Step | Action | Description |
|---|---|---|
| 1 | Clean Surface | Use mild detergent and water. |
| 2 | Dry Thoroughly | Confirm no moisture remains. |
| 3 | Apply Sealant | Evenly coat stickers and edges. |
| 4 | Allow to Dry | Follow sealant manufacturer’s instructions. |
| 5 | Inspect for Coverage | Confirm all areas are sealed. |
Avoid Excessive Moisture

Keeping your stickers dry is essential to guaranteeing they adhere properly to your water bottle. Excessive moisture can weaken the adhesive and cause your stickers to peel off. Here’s how to avoid it:
- Dry Bottle Before Application: Guarantee the bottle is completely dry using a lint-free cloth. Residual moisture can compromise adhesion.
- Use a Sealing Spray: Apply a clear, waterproof sealing spray over the stickers. This creates a protective barrier against moisture.
- Avoid Prolonged Exposure to Water: Limit the bottle’s exposure to water, especially during washing. If necessary, hand wash gently without submerging the entire bottle.
Handle With Care

To guarantee your stickers remain intact, handle the water bottle with care by avoiding rough handling and sharp objects that could scratch or peel the adhesive.
First, always place your water bottle in a cushioned compartment within your bag to minimize impact damage.
Second, avoid dropping the bottle or placing it on abrasive surfaces, as these actions can compromise sticker adhesion.
Third, when cleaning, use a soft cloth and gentle wiping motions to prevent lifting the sticker edges. Avoid using steel wool or other abrasive cleaning tools.
Finally, refrain from stacking heavy objects on top of the bottle, which can crush and deform stickers.
Reapply Sealant Regularly

Regularly reapplying a clear sealant over your stickers guarantees they stay protected from water, UV rays, and general wear and tear.
Follow these steps to maintain ideal protection:
- Clean Surface: Before reapplying, verify the bottle and stickers are clean. Use a mild detergent and water, then dry thoroughly to remove any residue or oils.
- Apply Sealant: Use a clear, waterproof sealant spray. Hold the can 6-8 inches from the surface and apply an even coat. Avoid drips by moving in a steady, sweeping motion.
- Cure Time: Let the sealant cure for at least 24 hours in a well-ventilated area. This guarantees a strong, durable finish that resists peeling and fading.
Conclusion
To keep your stickers on a water bottle, follow these steps meticulously.
Think of your stickers like delicate flowers; they need the right care to thrive.
Start with high-quality stickers, then clean and dry the bottle.
Plan your sticker layout and apply them with precision.
Use a protective sealant and avoid excessive moisture.
Handle your bottle gently and reapply sealant regularly.
By adhering to these steps, your stickers will stick around for the long haul.

