How to Clean Silicone Water Bottle? Easy Steps!
To clean your silicone water bottle, gather mild dish soap, a bottle brush, baking soda, white vinegar, and warm water. Disassemble the bottle by unscrewing the lid and separating all parts.
Rinse everything with warm water, then apply dish soap and gently scrub with the bottle brush. For stubborn stains, use a baking soda and soap mixture.
To deodorize, mix baking soda with warm water, and to sanitize, soak in a vinegar-water solution before a thorough rinse.
Air dry all parts on a drying rack in a well-ventilated area to prevent mold. Follow these steps to keep your bottle pristine.

Key Takeaways
Gather Your Supplies
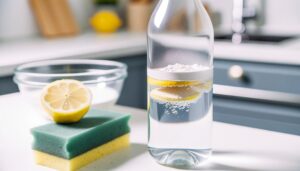
To start, you’ll need to gather a few essential supplies: mild dish soap, a bottle brush, baking soda, white vinegar, and warm water. These items are vital for effectively cleaning your silicone water bottle. Begin by filling the bottle with warm water and a few drops of mild dish soap, then use the bottle brush to scrub the interior thoroughly. For deeper cleaning, mix baking soda and white vinegar inside the bottle, allowing the solution to fizz and break down any residue. If you’re looking for detailed steps on how to clean Hydrapeak bottle, follow these methods to keep your bottle fresh and odor-free.
The mild dish soap helps break down any oils or residues. The bottle brush, with its long handle and bristles, guarantees you can scrub the entire interior thoroughly.
Baking soda acts as a gentle abrasive, perfect for tackling tough stains without damaging the silicone. White vinegar is a natural disinfectant that helps eliminate odors and bacteria.
Lastly, warm water aids in loosening grime and ensuring all cleaning agents work effectively. With these supplies, you’ll be well-prepared to keep your silicone water bottle spotless and hygienic.
Disassemble the Bottle
With your supplies ready, the next step is to disassemble the silicone water bottle to make sure every part gets a thorough cleaning.
Here’s a detailed breakdown of what to do:
- Unscrew the Lid: Twist the lid counterclockwise to remove it from the bottle.
- Detach Straw/Spout: If your bottle has a straw or spout, pull it out gently.
- Separate Silicone Seal: Look for any silicone seals or gaskets and remove them carefully.
Rinse With Warm Water
Start by rinsing your silicone water bottle with warm water, aiming for a temperature that’s comfortable to the touch but not scalding.
Use gentle rinsing techniques to guarantee you remove any surface debris without damaging the material.
After rinsing, make sure to dry the bottle thoroughly to prevent any moisture buildup that could lead to mold or mildew.
Optimal Water Temperature
Rinsing your silicone water bottle with warm water guarantees that any residual debris and bacteria are effectively loosened and washed away.
Using warm water, typically between 104°F (40°C) and 113°F (45°C), maximizes the cleaning process without damaging the silicone material.
Here’s a methodical approach to secure ideal water temperature:
- Use a Thermometer: Measure the water temperature to secure it falls within the best range.
- Test with Touch: If you don’t have a thermometer, the water should feel warm but not scalding to your touch.
- Adjust as Needed: If the water feels too hot or too cold, adjust the temperature accordingly before rinsing.
Gentle Rinsing Techniques
Once you’ve confirmed the water is at a perfect temperature, gently swirl the warm water around the inside of the silicone bottle to dislodge any lingering particles. Make sure to cover all areas, including the bottom and any hard-to-reach corners.
If your bottle has a narrow neck, shake it lightly while keeping the cap on to guarantee thorough rinsing.
Pay special attention to the spout or mouthpiece, as these areas often trap residue. You might need to repeat this process a couple of times until the water runs clear.
Avoid using boiling water, as it can deform the silicone. Remember, the key is to be gentle and thorough to maintain your bottle’s integrity while effectively removing any remnants.
Drying After Rinse
After thoroughly rinsing your silicone water bottle, carefully shake out any excess water to expedite the drying process. Guaranteeing your bottle is completely dry prevents mold and bacteria growth.
Follow these steps to dry it effectively:
- Air Drying: Place the bottle upside down on a clean, dry dish rack. Make sure the mouth is fully open to allow air circulation.
- Towel Drying: Use a clean, dry towel to pat the inside and outside. Insert the towel into the bottle using a long handle or utensil to reach all areas.
- Sun Drying: If possible, leave the bottle in a sunny spot. UV rays can help kill bacteria and speed up drying.
Apply Dish Soap
Now, select a gentle dish soap that won’t harm the silicone material. Apply a few drops of the soap thoroughly inside and outside the bottle.
Make sure to reach all the nooks and crannies to guarantee a thorough clean.
Choose Mild Dish Soap
When choosing a dish soap to clean your silicone water bottle, opt for a mild formula that effectively removes grime without causing damage.
Look for dish soaps labeled as gentle or formulated for delicate items. A mild dish soap guarantees your bottle remains in excellent condition while thoroughly cleaning it.
Here are three key things to take into account:
- Ingredients: Avoid soaps with harsh chemicals or strong fragrances, as they may degrade the silicone over time.
- Effectiveness: Make sure the soap is tough on grime and residue but gentle on the silicone material.
- Eco-friendly options: Consider selecting biodegradable or plant-based soaps, which are often gentler on both your bottle and the environment.
Apply Soap Thoroughly
Begin by squirting a small amount of your chosen mild dish soap directly into the silicone water bottle. Once the soap is inside, add warm water until the bottle is about halfway full.
Secure the cap tightly to prevent any leaks. Shake the bottle vigorously for about 30 seconds to a minute; this guarantees the soap disperses evenly and reaches every corner of the interior.
Don’t forget to also clean the cap and mouthpiece. Use a bottle brush to scrub the inside thoroughly, focusing on any stubborn spots.
Rinse the bottle and cap with warm water until all soap residue is gone. This method assures your silicone water bottle is clean and free from any lingering odors.
Use a Bottle Brush
To effectively clean the interior of your silicone water bottle, use a bottle brush designed specifically for narrow openings and curved surfaces.
The shape and flexibility of these brushes allow you to reach all areas inside the bottle, guaranteeing thorough cleaning.
Follow these steps:
- Insert the Brush: Carefully insert the brush into the bottle, making sure it reaches the bottom.
- Scrub: Gently scrub the interior surfaces, applying moderate pressure to dislodge any stubborn residue.
- Rinse: After scrubbing, rinse the bottle thoroughly with warm water to remove soap and loosened debris.
Using a bottle brush helps maintain your silicone water bottle’s hygiene and prolongs its lifespan. Be sure to clean the brush itself regularly to prevent contamination.
Scrub the Cap
Guarantee the cap thoroughly, paying special attention to any grooves or threads where grime can easily accumulate. Use a small brush or an old toothbrush to get into these tight spots.
Apply a bit of dish soap to the brush and work it into all the nooks and crannies. Rinse the cap under warm water, making sure to remove all soap residue. Inspect the cap to confirm no areas are missed.
If stubborn grime persists, soak the cap in a mixture of warm water and vinegar for about 15 minutes. After soaking, give it another scrub.
Finally, rinse well and let the cap air dry completely before reassembling your water bottle. This ensures a clean, fresh drinking experience.
Clean the Mouthpiece
Focus on the mouthpiece next, ensuring you clean every part that comes into contact with your mouth. Start by using a small brush or a toothbrush dedicated to cleaning your bottle.
Follow these steps:
- Disassemble the Mouthpiece: If your bottle’s mouthpiece is detachable, take it apart to reach all the nooks and crannies.
- Scrub Thoroughly: Apply a small amount of dish soap to the brush, then scrub the inside and outside of the mouthpiece, paying special attention to any ridges or crevices.
- Inspect for Residue: After scrubbing, visually inspect the mouthpiece for any remaining residue or buildup. If necessary, repeat the cleaning process.
Rinse Thoroughly
Start by giving your silicone water bottle an initial rinse with warm water to loosen any remaining particles. This step helps in removing residual debris that may be clinging to the inner surfaces.
Make sure you allow the bottle to drain completely, ensuring no water is left trapped inside.
Initial Warm Water Rinse
Begin by filling your silicone water bottle with warm water to loosen any residue and prepare it for a thorough cleaning.
This initial rinse is important for effectively removing surface grime and making sure the bottle is ready for deeper cleaning steps.
Follow these steps to guarantee thorough rinsing:
- Fill the Bottle: Pour warm water into the bottle until it’s about three-quarters full. The warmth helps dissolve residues without damaging the silicone.
- Shake Vigorously: Secure the cap and shake the bottle for at least 30 seconds. This agitation will help dislodge any particles stuck to the sides.
- Rinse Completely: Empty the bottle and rinse it with warm water again to wash away any remaining loosened debris.
Removing Residual Debris
Make sure to thoroughly rinse the inside and outside of the bottle with warm water to guarantee all residual debris is washed away.
Hold the bottle under a steady stream of warm water, and use your hands to make certain the water reaches every corner. Pay particular attention to the bottle’s neck and cap, as debris often hides in these areas.
Here’s a quick guide for a meticulous rinse:
| Step | Action |
|---|---|
| 1 | Remove the cap and rinse it separately. |
| 2 | Fill the bottle halfway with warm water. |
| 3 | Shake vigorously to dislodge debris. |
| 4 | Empty and rinse thoroughly again. |
Following these steps, you’ll have a clean, debris-free bottle ready for the next phase of cleaning.
Ensuring Proper Drainage
Guaranteeing your silicone water bottle drains properly is crucial to prevent mold and bacteria growth, which can thrive in stagnant water. After washing, you need to rinse the bottle thoroughly to remove any soap residue.
Here’s how you can ensure proper drainage:
- Invert the bottle: Turn the bottle upside down and shake it gently to let excess water escape.
- Air dry completely: Place the bottle on a drying rack, making sure it stands inverted or at an angle to allow airflow.
- Check for trapped moisture: Inspect the bottle after a few hours to ensure all water has evaporated, especially around the cap and crevices.
Remove Stubborn Stains
To remove stubborn stains from your silicone water bottle, start by filling it with a mixture of warm water and baking soda.
| Step | Action |
|---|---|
| 1 | Fill bottle with warm water and baking soda |
| 2 | Let it sit for 30 minutes |
| 3 | Scrub with a bottle brush |
| 4 | Rinse thoroughly |
Deodorize With Baking Soda
Eliminate lingering odors from your silicone water bottle by using a simple yet effective baking soda solution.
Here’s a step-by-step method to guarantee your bottle smells fresh and clean:
- Prepare the Solution: Mix 1-2 tablespoons of baking soda with warm water. Stir until the baking soda is fully dissolved, creating a slightly cloudy solution.
- Fill the Bottle: Pour the baking soda solution into your silicone water bottle. Make sure it’s filled to the top, allowing the solution to contact all interior surfaces.
- Let It Sit: Allow the solution to sit in the bottle for at least 24 hours. This extended period helps the baking soda neutralize any stubborn odors.
Afterward, rinse thoroughly with clean water to remove any residual baking soda.
Sanitize With Vinegar
Vinegar is a powerful natural disinfectant that will effectively sanitize your silicone water bottle, eliminating bacteria and mold.
To begin, fill your bottle halfway with equal parts of white vinegar and warm water. Secure the lid and shake the bottle vigorously for about 30 seconds to guarantee the solution reaches all surfaces.
Let it sit for 15-20 minutes to allow the vinegar to work its magic. After soaking, pour out the solution and use a bottle brush to scrub the interior, paying special attention to the bottle’s neck and cap.
Rinse thoroughly with warm water to remove any vinegar residue. Your bottle will now be sanitized and ready for use, free from harmful microorganisms.
Air Dry Completely
Guaranteeing that your silicone water bottle air dries completely is crucial for preventing the growth of mold and bacteria.
After cleaning and sanitizing, follow these steps methodically to ensure thorough drying:
- Disassemble all parts: Remove the lid, mouthpiece, and any other detachable components. This allows air to circulate freely and reach every part.
- Place on a drying rack: Position the bottle and its components upside down on a drying rack. This helps water drain out fully and promotes even drying.
- Choose a well-ventilated area: Place the drying rack in a spot with good airflow. Avoid confined spaces, as they can trap moisture and slow down the drying process.
Reassemble and Store
Once your silicone water bottle is thoroughly dry, carefully reassemble all its components to guarantee a proper seal and functionality.
Start by attaching the mouthpiece to the bottle body, making sure it fits snugly. Next, securely screw on the cap, checking for any gaps that could cause leaks. Reattach any additional parts like straws or filters, aligning them accurately.
For best storage:
| Task | Description |
|---|---|
| Store with Cap On | Prevents dust and contaminants from entering. |
| Avoid Direct Sunlight | Prolongs the material’s lifespan by preventing UV damage. |
| Keep in a Cool, Dry Place | Inhibits mold and bacterial growth. |
| Regular Inspection | Check for wear and tear to ensure continued safe use. |
Conclusion
So, you’ve meticulously followed each step to clean your trusty silicone water bottle. Who knew a simple bottle could demand such dedication? But hey, now it sparkles like new, free from hidden odors and lurking bacteria.
Isn’t it ironic that something designed to keep you hydrated could harbor the very germs you try to avoid? Now, store it wisely, and enjoy the peace of mind that comes with a truly clean water bottle.
Happy hydrating!


