Diy Water Bottle Shower: Easy Steps!
Create your own portable shower with a sturdy 2-liter plastic bottle and a few simple tools.
This setup is perfect for quick outdoor showers—discover more tips on enhancing your DIY water bottle shower.
Key Takeaways
Materials Needed
To create your DIY water bottle shower, you’ll need a few specific materials: an empty plastic water bottle, a thumbtack, and a length of flexible tubing. First, make sure your water bottle is clean and dry.
You’ll need a thumbtack to puncture small holes in the bottle cap—approximately 10 to 15 evenly spaced holes work best.
For the flexible tubing, a length of about 3 feet (1 meter) is ideal. This tubing should fit snugly over the bottle’s mouth to guarantee a secure connection.
Additionally, having a small clamp or rubber band can help keep the tubing in place. These materials are easy to acquire and essential for constructing an efficient DIY water bottle shower.
Choosing the Right Bottle
Selecting the right bottle is crucial to guaranteeing your DIY water bottle shower functions at its best.
- First, choose a bottle with a minimum capacity of 2 liters; this guarantees sufficient water flow.
- Opt for a bottle made of sturdy plastic, such as PET or HDPE, to withstand pressure without leaking.
- The bottle should have a wide mouth, at least 1 inch in diameter, for easy filling and cleaning.
- Make sure the cap is tight-fitting to prevent leaks when inverted.
- A bottle with a smooth, cylindrical shape is ideal for even water distribution.
- Finally, avoid bottles with intricate designs or weak spots, as these can compromise durability.
Preparing the Bottle
| Step | Description |
|---|---|
| 1 | Clean the bottle with warm, soapy water. |
| 2 | Rinse and dry the bottle thoroughly. |
| 3 | Mark the bottle at desired height. |
| 4 | Secure bottle and cut along the line. |
| 5 | Sand cut edges with fine-grit sandpaper. |
This guarantees a well-prepared bottle ready for the next steps.
Creating the Shower Head
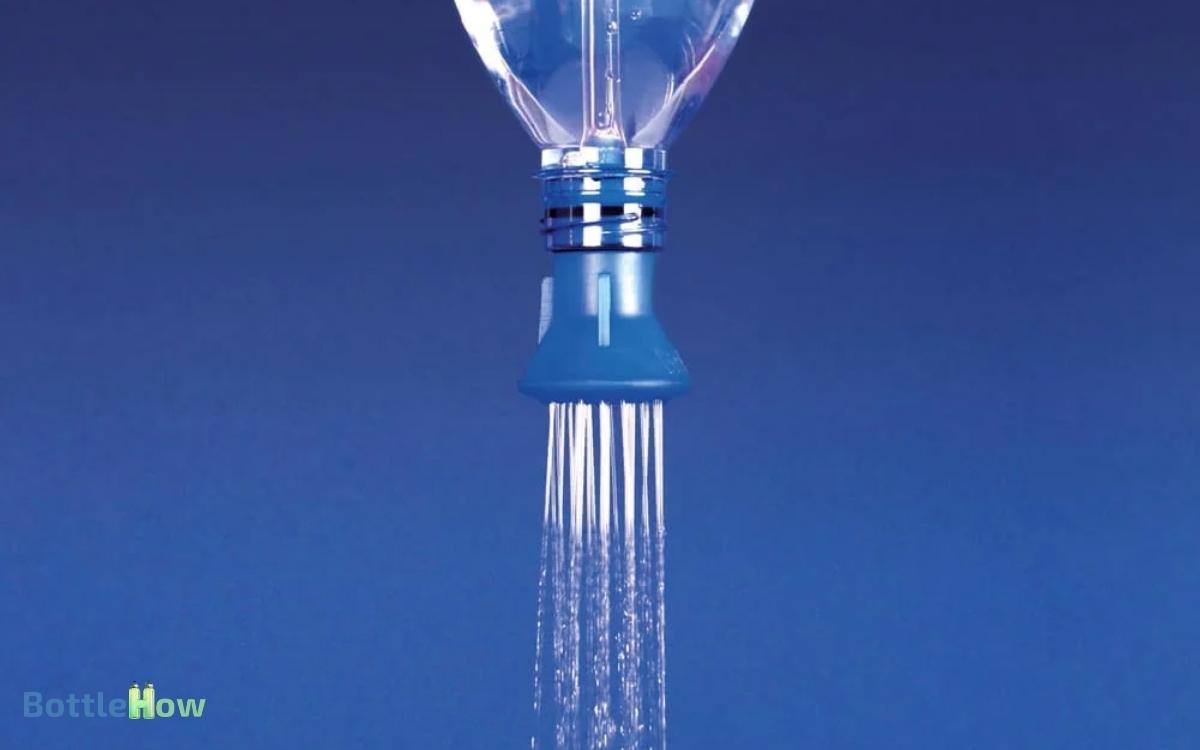
Begin by drilling multiple small holes evenly spaced across the bottle cap to create the shower head. Use a 1/16-inch drill bit for best results.
Secure the bottle cap in a vise or clamp to prevent movement. Drill approximately 10-12 holes, ensuring consistent spacing. Rotate the cap periodically to maintain precision.
Next, remove any plastic debris or burrs from the drilled holes using a small file or sandpaper. This step guarantees smooth water flow.
Attaching the Shower Head
Carefully screw the modified bottle cap onto the water bottle to attach your newly created shower head.
Confirm the cap is aligned correctly with the bottle’s threads. Twist clockwise until you feel resistance; this guarantees a snug fit.
Check for any gaps between the cap and bottle. The holes in the cap should be evenly spaced and not obstructed.
Hold the bottle upright and test the attachment by gently shaking it; the cap should remain securely in place.
Verify that water flows smoothly through the holes by filling the bottle and squeezing it. If the flow is uneven, recheck the holes for blockages.
Make sure there’s no leakage around the cap-thread interface, as this could affect performance.
Sealing the Bottle
Guaranteeing a watertight seal is crucial to preventing leaks during use. Start by applying a bead of silicone sealant around the neck of the bottle where the shower head attaches.
Use a caulking gun for precision. Smooth out the sealant with a gloved finger or a tool to ensure even coverage. Allow the sealant to cure for at least 24 hours, as per the manufacturer’s instructions.
Next, wrap the threaded end of the shower head with Teflon tape. Make sure to cover all threads evenly, applying at least two layers. Screw the shower head onto the bottle tightly, but avoid overtightening.
Check for any gaps and apply additional sealant if necessary. This guarantees a robust seal, minimizing potential leaks.
Adding the Water
You can choose from several water sources, such as a tap, hose, or water jug. For efficient filling, place the bottle under the source and fill it to 90% capacity to allow for pressure build-up.
Make sure the water is at a comfortable temperature to avoid any discomfort during use.
Water Source Options
To start, fill your water bottle with clean, fresh water, making sure it’s not overfilled to allow for proper pressure when the cap is punctured. Use a funnel to prevent spills and fill the bottle up to 90% of its capacity.
You can source your water from various places: tap water, filtered water, or even collected rainwater if it’s clean. Confirm the water temperature suits your preference; lukewarm water is ideal for comfort.
If you’re using a larger water container, transfer the water into the bottle using a siphon or pump to maintain cleanliness. Always make sure your water source is uncontaminated to avoid any health risks.
This preparation guarantees your DIY shower is both effective and safe.
Filling Techniques Explained
After securing a clean water source, it’s important to check that your bottle’s capacity is suitable; a 1-2 liter bottle works best.
Place a funnel in the bottle’s opening to prevent spills. Pour water slowly to avoid air bubbles, which can disrupt flow. If the bottle fills too quickly, pause to let the liquid settle before continuing. Once full, securely close the bottle to prevent leaks. Exploring cool uses for empty bottles can help with organization, decoration, or even DIY projects around the house.
Fill the bottle up to 90% capacity, leaving some space for air pressure. Tighten the cap but don’t overdo it; the seal needs to be secure but not overly tight.
If using a nozzle, attach it firmly to the cap. Test the water flow by squeezing the bottle gently. Adjust the nozzle or cap if the flow isn’t consistent. Your water bottle shower is now ready for use!
Creating Water Pressure
Achieving ideal water pressure involves creating a small, airtight hole near the bottom of the water bottle.
Follow these steps to guarantee peak performance:
- Select a drill bit: Choose a 1/16-inch drill bit for precise control.
- Mark the location: Measure 1 inch above the bottom of the bottle and mark the spot.
- Drill the hole: Carefully drill perpendicular to the bottle’s surface to maintain an airtight seal.
- Seal the edges: Use waterproof silicone sealant around the hole to prevent leaks.
Testing the Shower
Test your DIY water bottle shower by filling the bottle with water and observing the flow through the drilled hole.
Make sure the hole size is adequate for a consistent stream. Hold the bottle upside down and note the water pressure and distribution. Use a stopwatch to measure the time it takes for the bottle to empty.
Repeat the test for various hole sizes and document the differences in flow rate and empty time. This data will help you evaluate the efficiency of your shower.
Adjusting Water Flow
To fine-tune your DIY water bottle shower, adjust the hole size or add multiple holes to control the water flow and pressure. Start with a small drill bit, around 1/16 inch, to create initial holes.
Test the shower, then follow these steps:
- Guarantee hole size: Use a slightly larger bit, like 1/8 inch, if the flow is too weak.
- Add more holes: Drill additional holes evenly spaced around the cap for more flow.
- Seal excess holes: Use waterproof tape to cover any unwanted holes if the flow is too strong.
- Verify for uniformity: Make sure that all holes are of equal size for consistent pressure.
Using the Shower
Once you’ve perfected the water flow, hang your DIY water bottle shower at a suitable height, securing it with a sturdy rope or hook. Make sure it’s positioned 6-7 feet above ground level to allow for best water flow and coverage.
Stand directly beneath the showerhead. When you’re ready, twist the bottle cap to activate the water flow.
Adjust your position to guarantee the water covers your entire body. Keep your soap, shampoo, and other bathing essentials within arm’s reach.
Use the shower efficiently, as the water supply is limited. Remember, twist the cap shut to stop the water flow when you’re done.
This step-by-step approach will ensure a satisfying and invigorating shower experience.
Cleaning and Maintenance
To maintain your DIY water bottle shower, follow these steps:
- Rinse the bottle with a vinegar solution (1 part vinegar, 3 parts water) weekly.
- Store it in a dry, ventilated area to prevent mold growth.
- Regularly inspect the nozzle for any buildup and clean with a small brush.
Regular Cleaning Routine
Ensuring your DIY water bottle shower remains in peak condition requires a consistent cleaning routine that involves rinsing all components with a mixture of 1 part vinegar to 3 parts water every week.
Follow these steps for effective maintenance:
- Disassemble the water bottle and nozzle.
- Soak each part in the vinegar-water solution for 15 minutes.
- Use a small brush to scrub away any residue.
- Rinse thoroughly with clean water and allow to air dry.
Regular cleaning prevents mold and mineral buildup, promoting peak performance. Don’t skip this routine; it’s essential for maintaining hygiene and functionality.
Proper Storage Tips
For optimal longevity, store your DIY water bottle shower in a cool, dry place to prevent bacterial growth and material degradation. Make sure it’s completely dry before storage to avoid moisture buildup.
Follow these steps for proper storage: empty the bottle, rinse it with clean water, and let it air-dry fully.
| Step | Details |
|---|---|
| 1. Empty | Remove all water from the bottle. |
| 2. Rinse | Clean with fresh water; use a brush if needed. |
| 3. Air-dry | Place upside down to drain completely. |
| 4. Inspect | Check for any remaining moisture or residue. |
| 5. Store | Place in a dry, shaded area. |
Preventing Mold Growth
While proper storage is important, regular cleaning and maintenance are key to preventing mold growth in your DIY water bottle shower.
To guarantee your shower remains hygienic, follow these steps:
- Rinse thoroughly: After each use, empty the bottle and rinse it with clean water to remove any soap or debris.
- Sanitize weekly: Mix a solution of 1 part white vinegar to 3 parts water. Fill the bottle and let it sit for 30 minutes before rinsing.
- Dry completely: Leave the bottle open to air dry, ensuring no moisture remains inside.
- Inspect regularly: Check for any signs of mold or mildew, and clean immediately if detected.
Storing the Shower
Make sure your DIY water bottle shower is completely dry before storing it to prevent mold growth.
First, disassemble the shower head and the bottle cap. Use a clean, dry cloth to wipe each component thoroughly.
Next, allow all parts to air dry for at least 24 hours. Guarantee no moisture remains inside the bottle by placing it upside down on a drying rack.
Once dry, reassemble the components. Store the shower in a cool, dry place. Avoid areas with high humidity.
If possible, keep it in a sealed plastic container to protect it from dust and dirt. This method guarantees your DIY water bottle shower remains clean and ready for future use.
Conclusion
You’ve mastered the art of transforming a simple water bottle into a functional shower. With precision and care, you’ve chosen, prepared, and tailored your bottle, turning it into a mini marvel.
As you adjust water flow and bask in your creation’s utility, remember: maintenance and proper storage guarantee longevity.
Your DIY journey has brought forth a practical, portable shower solution. Keep experimenting and innovating; your ingenuity is boundless, like a river carving its own path.

