Diy Water Bottle Filter Aquarium: Easy & Quick Guide!
Creating a DIY water bottle filter for your aquarium is a fantastic way to keep your fish healthy and save money.
Regular maintenance is key—rinse filter media weekly and replace parts as needed. If you’re keen to enhance your aquarium’s filtration even further, there’s a wealth of detailed steps and tips ahead.

Key Takeaways
Gather Your Materials
Starting your DIY water bottle filter project requires gathering a list of essential materials to guarantee your aquarium stays clean and healthy.
- Clean, empty water bottle
- Activated carbon
- Filter floss
- Sponge pieces
- Scissors or craft knife
- Rubber bands
- Small powerhead or air pump
- Measuring tape or ruler
With these items, you’ll be well-equipped to create an efficient, homemade filter for your aquatic environment.
Choosing the Right Bottle
Here’s a quick comparison to help you decide:
| Feature | Importance |
|---|---|
| BPA-Free | Safe for fish |
| Transparency | Easy monitoring |
| Secure Cap | Prevents leaks |
A well-chosen bottle ensures that your filter works efficiently and safely. Don’t compromise on quality; your aquatic friends depend on it. Selecting the correct bottle is the cornerstone of a successful DIY filter project.
Preparing the Bottle
You’ve got your bottle, now let’s make sure it’s ready for action. Start by thoroughly cleaning it to remove any residues or contaminants.
After it’s spotless, carefully cut the bottle to create the necessary openings for your filter setup.
Choosing the Bottle
Selecting the right water bottle for your aquarium filter is crucial, as it guarantees both durability and efficient water flow.
You’ll want a bottle made from sturdy plastic that can withstand the constant pressure of water passing through. Opt for BPA-free materials to confirm no harmful chemicals leach into your tank.
Size matters too—choose a bottle that fits easily within your aquarium but has enough capacity to hold the filter media.
Bottles with wide mouths make filling and maintenance simpler. Avoid bottles with odd shapes or complex contours, as these can impede water flow and complicate the setup.
A clear plastic bottle allows you to monitor the filter’s condition easily. With the right choice, you’ll establish a seamless filtration system.
Cleaning the Bottle
Before you start assembling your DIY aquarium filter, thoroughly clean the bottle to make sure it’s free of contaminants that could harm your fish. Begin by rinsing the bottle with warm water, removing any labels and adhesive residue.
Use a mild dish soap to clean the inside and outside, followed by a thorough rinse to guarantee no soap remains. This step is important for maintaining a healthy environment for your aquatic friends.
Here’s a quick cleaning guide:
| Step | Action | Tools Needed |
|---|---|---|
| 1 | Remove labels and residue | Warm water, sponge |
| 2 | Wash with dish soap | Mild dish soap, brush |
| 3 | Rinse thoroughly | Warm water |
Cutting the Bottle
Now that your bottle is clean, it’s time to carefully cut it to transform it into an effective aquarium filter.
First, mark a line around the bottle about one-third from the bottom. This will be the section for your filter media.
Use a sharp utility knife or scissors, making sure you cut smoothly along the marked line to avoid jagged edges. Be precise and take your time—safety is crucial.
Next, make a few small holes in the bottom section for water flow. You can use a heated needle or a small drill bit. These holes should be evenly spaced.
Cutting the Bottle
When cutting the bottle, you’ll need precision and safety. Start by carefully measuring the sections where you’ll make your cuts to guarantee a perfect fit for your aquarium.
Use a sharp blade or scissors, and always cut away from your body to avoid accidents.
Measuring the Bottle
Start by using a measuring tape to mark the desired cutting line on the water bottle, ensuring it will fit securely into your aquarium setup.
Measure the height and diameter of the bottle, considering where it will be positioned. This step is essential for proper filtration and stability.
Use a marker to draw a clear line around the bottle at the measured height. Precision is key here, as uneven cuts can impede the filter’s effectiveness. Double-check your measurements before proceeding.
Make sure the marked section will allow easy access for maintenance and changes. Your careful attention to detail at this stage ensures a well-functioning DIY filter that enhances your aquarium’s health and aesthetic.
Safe Cutting Techniques
To begin cutting the bottle safely, secure the bottle firmly to prevent any slipping that could lead to uneven cuts or injury. Use a clamp or a vice, ensuring the bottle is stable.
Mark your cutting line with a permanent marker for precision. Opt for a sharp utility knife or a heated knife to make clean, controlled cuts.
Always cut away from your body, maintaining a steady hand. Wear protective gloves to shield your hands from accidental nicks.
If using a heated knife, work in a well-ventilated area to avoid inhaling fumes. Take your time, don’t rush.
A smooth, deliberate approach will yield the best results, ensuring your bottle becomes an effective, safe filter for your aquarium.
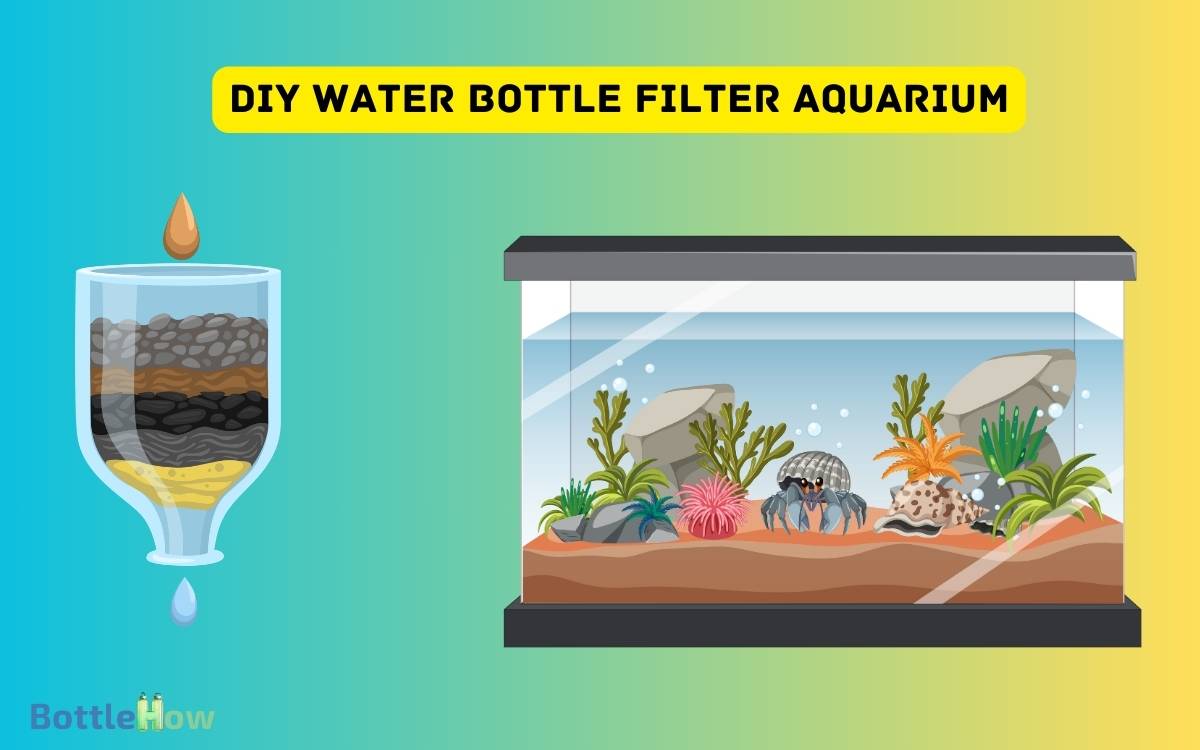
Adding Filter Media
Have you ever wondered how to optimize your DIY aquarium filter by selecting the perfect filter media to maintain pristine water conditions?
- Start by using coarse sponge at the bottom for mechanical filtration; it traps large debris.
- Then, add activated carbon to remove toxins and odors, ensuring crystal-clear water.
- Next, place bio balls or ceramic rings for biological filtration; these harbor beneficial bacteria that break down harmful ammonia and nitrites.
- Finally, top it off with fine filter floss to catch tiny particles, polishing the water.
Each layer has a unique role, and together they create a balanced ecosystem.
Creating the Intake
After perfecting your filter media layers, let’s focus on creating an efficient intake system to guarantee the water flows smoothly through your DIY aquarium filter.
Start by selecting a suitable intake tube; a sturdy plastic straw or a section of aquarium airline tubing works well. Attach this to the base of your water bottle, making sure it’s secure and airtight. Ensure that the intake tube extends far enough into the bottle to effectively draw water upward. This step is crucial in understanding how to make a humidifier that functions efficiently by maintaining a steady flow of moisture. Once secured, test the setup by gently blowing air through the tube to check for any leaks or loose connections.
You might need to use silicone sealant for a tight fit. Position the intake near the bottom of your aquarium, where debris tends to accumulate. To prevent clogging, cover the end of the intake tube with a fine mesh or sponge.
This setup ensures that your filter draws in contaminated water efficiently, maximizing its cleaning ability and maintaining a healthy environment for your aquatic friends.
Making the Output
Now, let’s focus on creating an efficient output system to guarantee your filtered water returns smoothly to the aquarium.
Start by ensuring your water bottle’s output hole is positioned near the top, allowing gravity to assist the water flow.
Here’s a quick guide:
- Drill the Output Hole: Make a hole slightly smaller than the tubing’s diameter.
- Attach Tubing: Insert the tubing snugly into the hole, ensuring a watertight fit.
- Direct the Flow: Position the tubing to return water directly into the aquarium, avoiding splashes.
Sealing the Filter
To seal the filter properly, you need to choose the right sealant type, such as aquarium-safe silicone.
Make sure you apply the sealant evenly around all joints to guarantee a watertight seal that prevents leaks.
This step is vital for maintaining the efficiency and longevity of your DIY water bottle filter.
Choosing Sealant Type
Selecting the right sealant for your aquarium water bottle filter is crucial to guarantee a secure and leak-proof setup. You’ll need a sealant that’s safe for aquatic life, durable, and easy to apply.
Here are three great options to ponder:
- Silicone Aquarium Sealant: Specifically formulated for aquarium use, it’s non-toxic and highly flexible, perfect for creating a watertight seal.
- Epoxy Resin: This two-part adhesive offers exceptional strength and durability, ideal for long-term use, though it needs careful handling during application.
- Polyurethane Sealant: Known for its waterproof properties and flexibility, it’s a versatile choice but ensure it’s labeled safe for aquarium use.
Choose wisely to keep your aquatic environment safe and your filter functioning efficiently.
Ensuring Watertight Seal
Achieving a watertight seal for your aquarium water bottle filter is crucial to prevent leaks and maintain a healthy aquatic environment.
- First, clean the bottle and all connecting parts thoroughly to guarantee no debris interferes with the seal.
- Apply a generous bead of aquarium-safe silicone sealant around the edges of each connection point.
- Press the parts together firmly and hold for a few minutes to allow initial bonding.
- Let the sealant cure for at least 24 hours before testing the filter.
- Check for any leaks by running water through the filter outside the aquarium. If you spot any leaks, reapply the sealant as needed.
This meticulous sealing process ensures your filter functions efficiently, keeping your aquatic friends safe and happy.
Installing the Filter
Start by gathering all the necessary tools and materials to guarantee a smooth and efficient installation of your water bottle filter in the aquarium.
Make sure you have:
- Filter media (such as activated carbon or sponge)
- Aquarium tubing
- Air pump
- First, insert the filter media into the water bottle, making certain it’s securely packed but allows water flow.
- Next, attach the tubing to the bottle’s neck, creating a tight seal.
- Connect the other end of the tubing to the air pump.
- Position the bottle inside the aquarium, making sure it’s submerged but not obstructing fish movement.
- Secure the bottle with suction cups or weights if necessary.
- Plug in the air pump, and watch your filter come to life.
Testing the Filter
With everything set up, it’s time to turn on the air pump and carefully monitor the water flow through your DIY filter.
Watch as water starts circulating, ensuring it’s moving smoothly and consistently. Look for any irregularities like leaks or blockages.
The filter media should begin trapping debris, indicating it’s working. Check the water clarity over the next few hours; it should progressively clear up.
Test the water parameters, particularly ammonia, nitrite, and nitrate levels, to confirm the filter’s effectiveness.
If you notice any issues, turn off the pump and inspect your setup for adjustments. Remember, a well-functioning filter not only keeps your water clean but also maintains a healthy environment for your aquatic life.
Maintenance Tips
Regular maintenance of your DIY water bottle filter guarantees it continues to operate efficiently, providing a clean and healthy environment for your aquarium inhabitants.
Prioritize these essential tasks to secure peak performance:
- Rinse the filter media weekly: Remove accumulated debris and waste by gently rinsing the media in aquarium water. Avoid using tap water to preserve beneficial bacteria.
- Inspect and replace parts monthly: Check for wear and tear on sponges, carbon, and other components. Replace any worn-out parts to maintain filtration efficacy.
- Clean the bottle and tubing quarterly: Disassemble the filter, scrub the bottle, and clear any buildup in the tubing. This prevents clogs and maintains water flow.
Troubleshooting Issues
When your DIY water bottle filter isn’t performing as expected, identifying and resolving common issues swiftly guarantees your aquarium remains a safe haven for your aquatic pets.
First, check for clogs; debris buildup can impede water flow. Clean the filter media regularly to guarantee peak performance.
If water flow is weak, inspect the air pump and tubing for leaks or blockages. Sometimes, repositioning the filter can help improve circulation. Confirm all connections are secure and airtight.
If your water remains cloudy, consider upgrading the filter media to more efficient materials. Regularly test your water parameters to catch any imbalances early.
Conclusion
You’ve transformed an ordinary water bottle into an efficient aquarium filter, a proof of your ingenuity and dedication. With every bubble rising, you’re not just purifying water, but nurturing life.
Remember, maintenance is key to keeping your aquatic world thriving. If issues arise, don’t fret—troubleshooting is part of the journey. Your homemade filter stands as a beacon of creativity, a lighthouse guiding your fish to a clearer, healthier habitat.
Immerse yourself, and enjoy the fruits of your labor!


