Diy Water Bottle Drip Irrigation:Step by Step Guide!
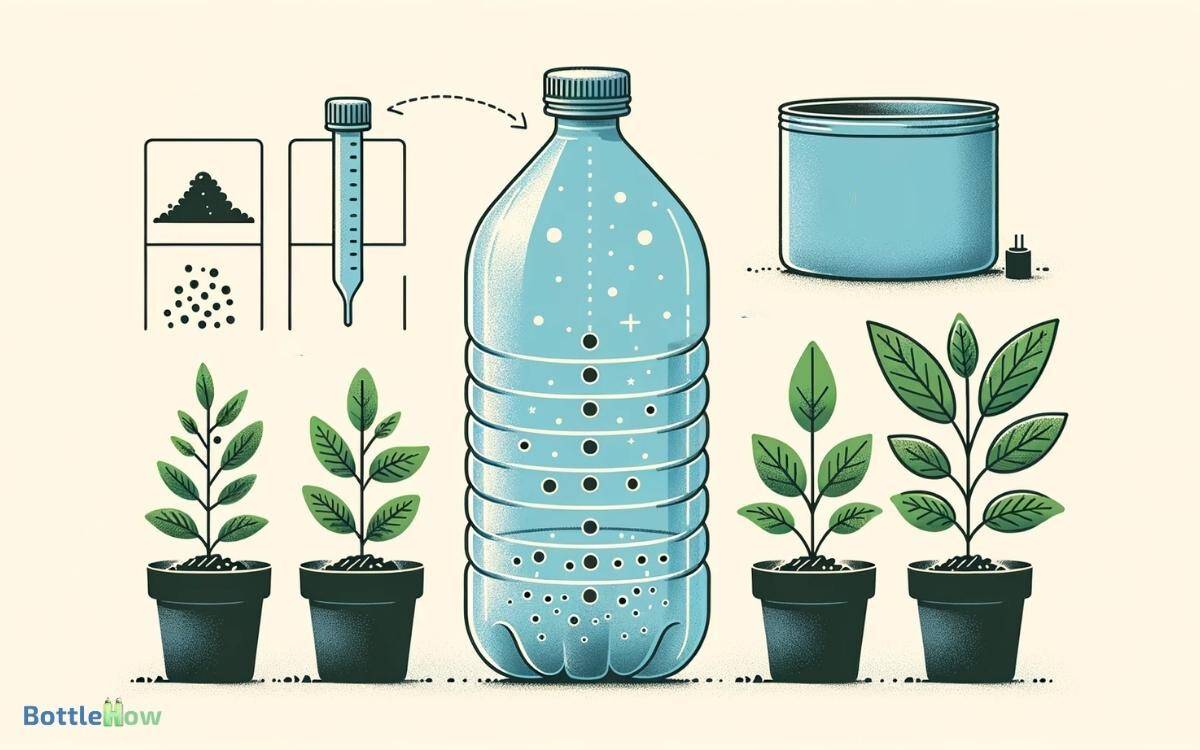
You can create an efficient DIY water bottle drip irrigation system with a few materials: a 2-liter plastic bottle, a 1/16-inch drill bit, a power drill, fine mesh, and rubber bands.
Choose high-density polyethylene bottles for better UV resistance. Thoroughly clean and rinse the bottles with vinegar to prevent mold.
Drill 1/16-inch holes evenly near the base for best water flow and cover the mouth with mesh to avoid clogs. Bury the bottles 1-2 inches below the soil, maintaining a slight angle.
Monitor and adjust the water flow for consistent soil moisture and enhanced plant hydration. Learn how these precise steps benefit your gardening.
Key Takeaways
Gather Your Materials
Begin by assembling the following materials:
- 2-liter plastic bottle
- 1/16-inch drill bit
- Power drill
- Small piece of fine mesh
- Rubber bands
These preparations are foundational for an effective DIY drip irrigation system, ensuring efficient water distribution to your plants.
Choose the Right Bottles
Selecting the right bottles for your DIY drip irrigation system is crucial to guarantee efficient water delivery and system longevity. You’ll need to take into account factors such as material durability, bottle size, and cap integrity.
Use these guidelines:
- Material Durability: Opt for high-density polyethylene (HDPE) bottles, as they resist UV degradation and can withstand outdoor conditions.
- Bottle Size: Choose bottles with a capacity of 1 to 2 liters for the best water flow without overwhelming your plants.
- Cap Integrity: Ensure the caps can be securely fastened and are leak-proof to maintain consistent drip rates.
These specifications will help you create a reliable and effective irrigation system. Remember, the right bottle choice directly impacts your system’s performance and maintenance requirements.
Prepare the Bottles
Begin by cleaning and thoroughly drying your bottles to prevent any contamination.
Next, use a small drill bit or a hot needle to puncture uniform holes, approximately 0.5 mm in diameter, around the lower third of each bottle. Make sure the spacing between holes is consistent for an even water distribution.
Clean and Dry Bottles
Thoroughly rinse each bottle with a solution of one part white vinegar to three parts water to make certain all residues are removed. This step is essential for preventing any contaminants from affecting your plants.
After rinsing, dry the bottles completely using a lint-free cloth. Make sure no moisture remains inside to avoid mold growth.
For best results, follow these additional steps:
- Disassemble: Remove all labels and adhesive remnants to prevent clogging.
- Inspect: Check each bottle for cracks or damage that could compromise the irrigation system.
- Sanitize: Optionally, sterilize bottles by soaking in a bleach solution (1 tablespoon bleach per gallon of water) for 10 minutes, then rinse thoroughly.
Puncture Small Holes
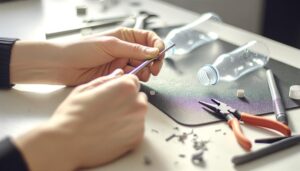
Using a heated needle or a fine drill bit, puncture evenly spaced small holes around the lower half of each bottle to guarantee consistent water flow.
Aim for holes approximately 1/16 inch in diameter, making sure they’re evenly distributed to promote uniform irrigation.
Position the holes about 1 inch apart horizontally and stagger them vertically to maximize coverage. If using a drill bit, operate at a slow speed to avoid cracking the plastic.
For a needle, heat it over a flame until red-hot for effortless penetration. Maintain a steady hand to guarantee precision.
After puncturing, inspect each hole for consistency. This meticulous approach ensures your DIY drip irrigation system functions efficiently, providing essential hydration to your plants.
Create the Drip Holes
To create the drip holes, you’ll need to determine the best hole size, usually between 1/16 to 1/8 inch, to control water flow.
Strategically place the holes near the base of the bottle to guarantee even distribution to the plant roots. Use a fine drill bit or a heated needle for precise and clean perforations.
Selecting Hole Size
Selecting the best hole size for your drip irrigation system is essential and typically involves using a 1/16-inch drill bit to guarantee a controlled water flow.
This precise measurement guarantees water is dispensed at an ideal rate, preventing both overwatering and underwatering.
Consider these factors when selecting your hole size:
- Soil Type: Sandy soils require larger holes for adequate hydration, while clay soils benefit from smaller holes to avoid waterlogging.
- Plant Needs: Different plants have varying water requirements. Adjust hole size accordingly to cater to specific hydration needs.
- Climate Conditions: In hotter climates, slightly larger holes can compensate for faster evaporation rates, ensuring plants receive enough moisture.
Proper Hole Placement
Proper hole placement in your DIY water bottle drip irrigation system guarantees efficient water delivery directly to the plant roots. To achieve this, make sure you position the holes 1-2 inches above the bottle’s base.
This placement ensures a consistent drip rate and prevents root rot. Utilize a precise measurement tool to mark the locations.
| Hole Placement | Distance from Base | Number of Holes |
|---|---|---|
| Best | 1-2 inches | 2-4 |
| Minimum | 0.5 inches | 1-2 |
| Maximum | 3 inches | 3-5 |
Space the holes evenly around the circumference to ensure uniform water distribution. Avoid placing holes too high, as this can lead to uneven soil moisture.
For advanced irrigation, consider the soil type and plant water requirements when determining hole placement.
Tools for Drilling
When creating the drip holes, you’ll often need precision tools such as a fine drill bit, an awl, or a heated needle to guarantee accuracy and consistency.
These tools enable you to achieve precise diameters and consistent spacing, which are essential for ideal water flow.
- Fine Drill Bit: Use a 1/16-inch bit to ensure uniform hole size, providing a steady drip rate.
- Awl: This pointed tool allows for control and exact placement, especially in plastic bottles.
- Heated Needle: Heat a sewing needle with a lighter; this method is effective for creating small, precise holes without cracking the plastic.
Each tool has its advantages, so choose based on your specific requirements. Properly drilled holes will promote even irrigation, ensuring your plants receive the right amount of water.
Test the Water Flow
To test the water flow, measure the drip rate by timing how long it takes for a specific volume of water to empty from the bottle. Start by filling your bottle with a known volume of water, such as 500 mL.
Use a stopwatch to measure the time taken for the water to drip out completely. This will allow you to calculate the flow rate in milliliters per minute (mL/min).
| Volume (mL) | Time (Minutes) |
|---|---|
| 500 | 60 |
| 250 | 30 |
| 100 | 12 |
Adjust the size of the holes if the flow rate is too fast or too slow. Aim for a consistent, slow drip to guarantee efficient irrigation. Regularly monitor and recalibrate if necessary for best plant hydration.
Position the Bottles
For ideal irrigation, position the bottles with their drip points directly above the root zones of your plants, guaranteeing water penetrates the soil efficiently.
Align each bottle vertically, maintaining a consistent distance from the plant stems, typically 3-4 inches. This setup maximizes water absorption and minimizes runoff.
Consider the following advanced techniques:
- Spacing: Guarantee bottles are spaced uniformly, about 8-12 inches apart, to cover the root spread effectively.
- Angle: Tilt the bottles slightly towards the plant base to optimize water delivery directly to the roots.
- Elevation: Elevate the bottles slightly using small supports to maintain consistent dripping rates and prevent soil clogging.
Bury the Bottles
Carefully bury the bottles so that the drip points are 1-2 inches below the soil surface, guaranteeing best water delivery to the root zones.
Use a trowel to excavate a precise cavity for the bottle. Maintain the bottle at a slight angle to facilitate ideal water flow. Make sure the bottle caps remain accessible for refilling. Pack the soil firmly around the bottle to hold it securely in place, ensuring stability during use. Test the diy water bottle shower by filling the bottle and adjusting the angle if necessary to achieve the desired water flow. For best results, choose a location with good drainage to prevent water from pooling around the setup.
Backfill the soil around the bottles, compacting it gently to avoid air pockets, which can disrupt water distribution. Verify the bottle’s stability to prevent displacement.
This method enhances sub-surface irrigation efficiency, reducing evaporation and ensuring consistent moisture delivery.
Confirm the soil type and plant root depth align with the 1-2 inch burial depth for maximum efficacy.
Monitor and Adjust
Regularly monitor the moisture levels around your plants to guarantee the drip irrigation system delivers sufficient water, making necessary adjustments based on weather conditions and plant needs.
Utilize a soil moisture meter to measure the soil’s water content precisely. If the soil feels too dry or wet, adjust the bottle’s drip rate by modifying the hole size or frequency.
Check soil moisture: Aim for a soil moisture level between 20-60% depending on plant type.
Adapt to weather changes: Increase drip frequency during hot, dry periods and reduce it during rainy seasons.
Observe plant health: Look for signs of overwatering (yellow leaves) or underwatering (wilting) and adjust accordingly.
Consistent monitoring ensures optimal hydration and plant health.
Benefits of Drip Irrigation
By employing drip irrigation, you guarantee efficient water usage and precise hydration tailored to each plant’s needs.
This method minimizes water waste by delivering moisture directly to the root zone, reducing evaporation and runoff.
You can fine-tune water delivery rates using various emitter types, ensuring optimal soil moisture levels.
Additionally, drip irrigation aids in preventing weed growth by limiting water exposure to non-target areas.
| Benefits | Details |
|---|---|
| Water Efficiency | Reduces evaporation and runoff |
| Precision Hydration | Directly targets root zones |
| Weed Prevention | Limits water to non-target areas |
Conclusion
You’ll find that your DIY water bottle drip irrigation system is a game-changer for efficient garden watering. It’s like having a personal garden assistant, delivering precise hydration where it’s needed most.
By continuously monitoring and adjusting the flow rate, you guarantee ideal moisture levels, promoting healthier plant growth.
This method not only conserves water but also saves time and effort, making it a smart, sustainable choice for any avid gardener.
Happy gardening!

