DIY Oil Spray Bottle: Crafting Guide!
You’re just a few steps away from crafting your very own oil spray bottle, elevating your culinary adventures and adding an artisanal flair to your kitchen.
Start by choosing a durable glass bottle for its eco-friendly properties and ability to preserve oil purity. You’ll need a spray nozzle and a stainless steel funnel to guarantee a clean, smooth transfer of your favorite oil blend.
After assembling, test the sprayer to achieve that perfect mist for cooking with precision and reducing oil waste.
Maintaining your DIY sprayer is simple, enhancing its longevity and performance. Soon, you’ll discover even more ways to optimize your homemade oil spray bottle.
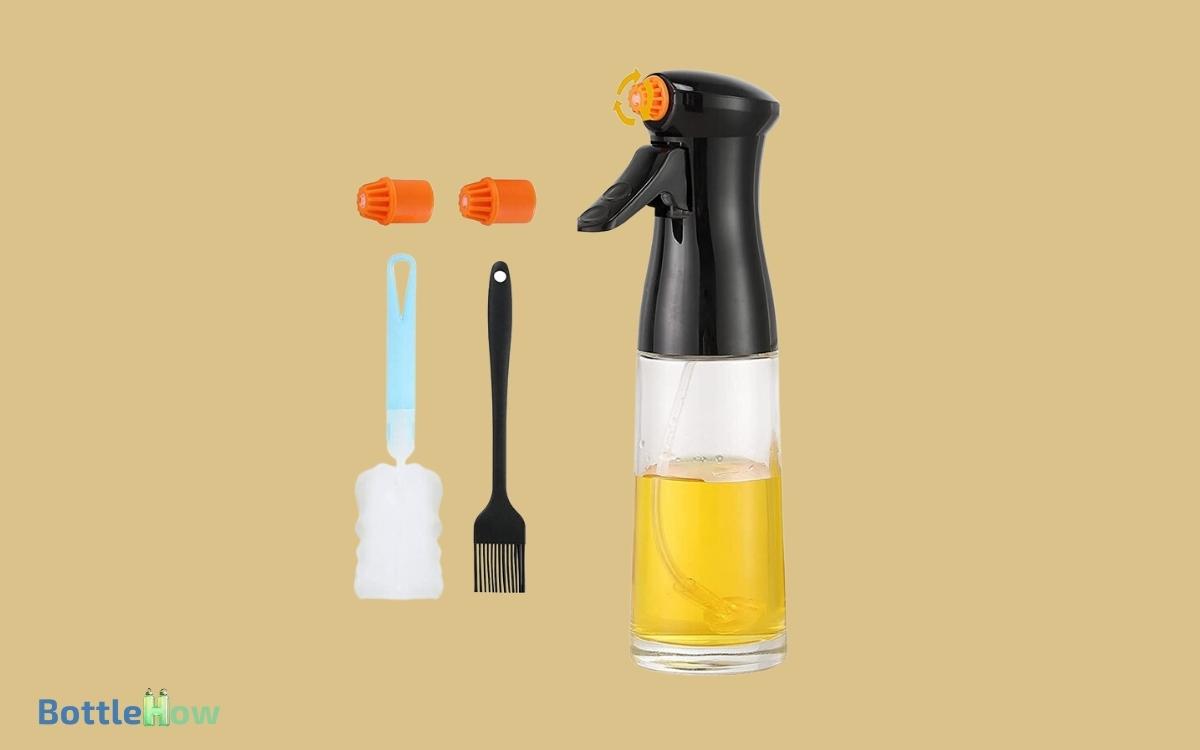
Key Takeaways
Why Make Your Own Oil Sprayer?
Creating your own oil sprayer not only saves money but also empowers you to control the quality and type of oil you use, making it a smart, personalized kitchen upgrade.
Imagine the delight in using a sprayer filled with your favorite olive oil, infused with herbs from your garden, or a unique blend that complements your culinary creations perfectly.
You’re not just crafting a tool; you’re tailoring your cooking experience to better serve your family and guests with healthier, flavor-enhanced dishes.
This endeavor not only adds a touch of artisanal charm to your kitchen but also deepens your connection to the food you prepare and share. It’s a meaningful step towards more conscious, customized cooking.
Choosing Your Bottle Material
As you begin creating your own oil spray bottle, choosing the right material is crucial. Consider the classic elegance of glass versus the lightweight durability of plastic, each impacting the stability of your oils differently.
Factor in the size of the container to best suit your culinary adventures, ensuring every spray delivers just the right touch of flavor.
Glass Vs. Plastic Options
When choosing between glass and plastic for your DIY oil spray bottle, consider how each material impacts durability, usability, and sustainability.
Each choice carries its own set of benefits that might motivate you as you start creating a tool that serves both your culinary and environmental ethos.
- Durability: Glass often outlasts plastic due to its resistance to scratching and odors, ensuring a longer life for your bottle.
- Usability: Plastic bottles are typically lighter and less fragile, making them easier to handle during your busy meal preparations or while serving others.
- Sustainability: Glass is 100% recyclable and can be reused without loss of quality, aligning with a commitment to eco-friendly practices.
Choose wisely, keeping in mind how your decision aligns with your values and the needs of those you serve.
Impact on Oil Stability
Your choice of material for a DIY oil spray bottle greatly impacts the stability and shelf life of the oils you store. Opting for glass over plastic not only guarantees your oils longer but also maintains their purity.
Imagine glass as a guardian, shielding your oils from harmful interactions and preventing the leaching that can occur with plastics. This choice guarantees that when you serve delightful, oil-infused dishes to those you care for, you’re providing the highest quality and benefit.
Glass, inherently inert and recyclable, aligns with eco-friendly values and serves a dual purpose: protecting our planet while keeping your oils in their most pristine state. Embrace glass, and let your culinary creations shine with integrity and love.
Container Size Considerations
Having considered the material for your DIY oil spray bottle, let’s explore how the size of the container can also influence the freshness and usability of your oils. Choosing the right size isn’t just practical; it’s a gesture of care for yourself and those you cook for.
Here’s why size truly matters:
- Portability: Smaller bottles are easier to handle and perfect for those who appreciate the grace in simplicity and the ease of carrying their creations.
- Freshness: Using smaller containers can help maintain oil quality, as you’ll refill them more frequently, ensuring a fresher supply.
- Waste Reduction: Tailoring bottle size to consumption rates minimizes waste, reflecting your commitment to sustainability and thoughtful living.
Embrace thoughtful sizing to enhance every spray of your culinary artistry.
Necessary Tools and Materials
To create your own DIY oil spray bottle, you’ll need a few essential tools and materials, including an empty bottle, a spray nozzle, and a funnel. Choose a glass bottle for its eco-friendliness and durability.
Make sure the spray nozzle fits the bottle’s neck to avoid messy leaks. A stainless steel funnel will ease the process of transferring oil without spillage, embodying efficiency and cleanliness in your kitchen tasks.
Select high-quality materials that promise longevity and reliability. Opt for a bottle that reflects your style—perhaps one with a sleek, modern design or a rustic, vintage flair.
By crafting this tool yourself, you’re not just preparing meals; you’re infusing love and care into every spray, enhancing the service you provide to others through your culinary creations.
Step-by-Step Assembly Instructions
Begin by thoroughly cleaning your glass bottle and drying it completely to guarantee no moisture interferes with the oil’s purity.
As you prepare to assemble your DIY oil spray bottle, remember that every detail counts towards creating a tool that’ll serve well in enhancing your culinary arts or daily skincare routines. Start by selecting a sturdy, reusable bottle that can withstand regular use, ensuring a fine mist for even application. Whether you’re using it for cooking oils or as a diy bidet spray bottle for personal hygiene, proper assembly and maintenance are key to longevity. A well-constructed spray bottle will not only be convenient but also an eco-friendly alternative to disposable options.
- Insert the Spray Mechanism: Carefully fit the spray nozzle onto the bottle, making sure it fits snugly and securely to prevent any leaks.
- Add Your Chosen Oil: Pour your preferred oil into the bottle using a funnel to avoid spills and maintain a clean workspace.
- Attach the Lid Tightly: Secure the lid onto the bottle to preserve the oil’s freshness and purity, ready for use whenever needed.
Embrace this opportunity to craft something truly beneficial for your home or as a thoughtful gift for someone special.
Testing Your DIY Sprayer
Now that you’ve assembled your DIY oil spray bottle, it’s crucial to test its functionality to ensure a fine, even mist with every press.
Begin by filling your bottle with your chosen oil, but don’t fill it to the brim leave some space to create air pressure. Secure the lid tightly. Give it a few gentle shakes to mix any air and oil inside.
Now, hold the bottle a few inches away from a plain surface and press the sprayer. Observe the spray pattern; it should be light and even, not spotty or overly concentrated. If the mist isn’t perfect, adjust the nozzle or check for any clogs.
Cleaning and Maintenance Tips
To guarantee your DIY oil spray bottle works flawlessly for years, embracing a regular cleaning routine is essential. Incorporate preventive maintenance measures; it’s not just about reacting to issues, but actively preventing them.
Regular Cleaning Routine
Keeping your DIY oil spray bottle in tip-top shape requires a regular cleaning routine that’s both simple and effective. To guarantee your bottle serves you and your loved ones well, imbue your maintenance with care and attention.
Here’s how to keep it sparkling:
- Disassemble and Soak: Take apart your spray bottle and soak all non-electric parts in warm, soapy water. This helps dissolve oil residues and prevents clogging.
- Scrub Gently: Use a soft brush or sponge to gently scrub the components. Pay special attention to the nozzle, as it can harbor the most buildup.
- Rinse and Dry: Thoroughly rinse all parts with warm water and allow them to air dry completely before reassembling.
Regular care guarantees your DIY projects shine, reflecting your dedication to nurturing through creativity.
Preventive Maintenance Measures
Beyond regular cleaning, adopting preventive maintenance measures will extend the life and enhance the performance of your DIY oil spray bottle.
To start, always empty it completely if you’re not planning to use it for a while. Stale oil can degrade the inner mechanisms.
After each refill, wipe the nozzle to prevent clogging and guarantee a fine mist. You might also consider using a thin needle to clear any blockages within the spray mechanism.
Periodically, give your bottle a ‘spa day’: soak all detachable parts in a warm, soapy solution, rinse thoroughly, and let them air dry.
This simple care ritual not only preserves your bottle but also honors the dedication you put into serving others with your culinary creations.
Troubleshooting Common Issues
When your DIY oil spray bottle starts misbehaving, understanding the root cause swiftly transforms frustration into satisfaction.
Here’s how you can nip those pesky problems in the bud:
- Clogged Nozzle: Often, tiny particles or thickened oil can block the nozzle. Run it under hot water or soak in vinegar to dissolve the blockage.
- Weak Spray: If the spray is weak, check for air leaks or tighten the pump mechanism. A well-sealed bottle guarantees a powerful spray every time.
- Irregular Flow: Make sure the tube inside isn’t bent or cut too short. It should reach the bottom and be free from kinks to provide a consistent flow.
Embrace these challenges as opportunities to refine your DIY skills and enhance your service to others.
Uses and Benefits
Now that you’ve mastered maintaining your DIY oil spray bottle, let’s explore how this tool can enhance your cooking and health. Imagine drizzling the perfect amount of olive oil over a fresh Caprese salad or finely misting your skillet for a golden-brown French toast.
This simple tool guarantees you use just the right amount of oil, reducing waste and promoting healthier eating habits by controlling calories without sacrificing flavor.
Moreover, it’s a boon for those you serve, allowing you to prepare light, heart-healthy meals that delight both the palate and the waistline. By embracing this tool, you’re not just cooking; you’re crafting nurturing experiences that feed the soul and foster well-being in every spritz.
Conclusion
Ready to revolutionize your kitchen routine with your new DIY oil sprayer? Imagine the flavors you can enhance and the calories you’ll save with just a simple press!
Isn’t it satisfying to create something both stylish and functional right at home? Remember, maintaining your sprayer is key to keeping it in top condition.
Embrace the ease and satisfaction of using your handcrafted tool. Explore healthier cooking and ignite your culinary creativity—what masterpiece will you cook up next?

