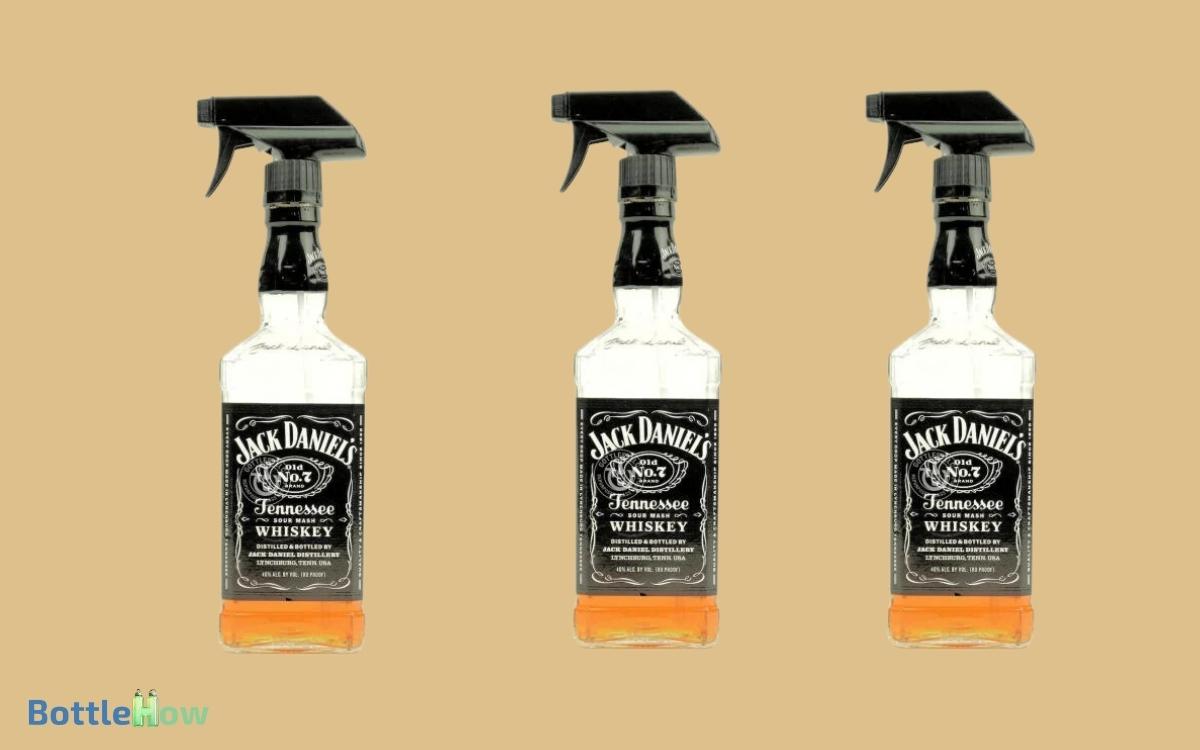
DIY Jack Daniels Spray Bottle: Crafting Instructions!
You’re about to give that empty Jack Daniels bottle a new life! Start by cleaning it thoroughly with warm soapy water, making sure to air dry to avoid water spots.
Next, match a spray nozzle that fits snugly onto the bottle’s neck this will prevent leaks. You might want to opt for a nozzle that has a variable spray pattern, depending on your needs.
Once aligned, twist on securely and seal the connection with a waterproof silicone sealant, smoothing it out for a tight finish. Give the sealant 24 hours to cure fully.
Finally, customize your bottle with paints or stickers for a personal touch. Keep following along, and you’ll uncover even more ways to refine and use your new spray accessory.
Key Takeaways
Gathering Your Materials
To kick off your DIY Jack Daniels spray bottle project, you’ll need to gather a few key materials: an empty Jack Daniels bottle, a spray nozzle that fits, and optionally, some decorative elements to personalize your creation.
First, make sure the Jack Daniels bottle is the right size; typically, a 750 ml or 1-liter bottle works perfectly.
For the spray nozzle, you can repurpose one from an old household product or purchase a new one from your local hardware store. Choose a nozzle with a watertight feature to guarantee your bottle functions well. Make sure the nozzle fits securely onto your chosen bottle to prevent leaks or spills. If you’re unsure how to open a spray bottle, check the manufacturer’s instructions or twist the top gently to see if it unscrews. Testing the spray mechanism with water before use can help ensure it operates correctly.
If you’re feeling creative, pick up some waterproof stickers, paint, or ribbons to add a personal touch. These can transform your spray bottle into a delightful, custom piece that’s both functional and stylish.
Preparing the Bottle
Before you can turn your Jack Daniels bottle into a bespoke spray dispenser, you’ll need to thoroughly clean and dry it to make sure it’s free from any residue or odors.
- Start by emptying the bottle of any remaining liquid.
- Next, fill it with warm water and a squirt of dish soap.
- Shake it vigorously to loosen any stubborn whiskey stains.
- Rinse several times with hot water until the soap is completely washed out.
- For a spotless finish, you might want to use a bottle brush to scrub the inside.
- Finally, let the bottle air dry completely, preferably upside down, to make certain no water spots are left behind.
This meticulous preparation sets the stage for the next step: selecting the perfect spray nozzle.
Selecting the Spray Nozzle
Before you attach any spray nozzle, you’ll need to make sure it fits snugly with your Jack Daniels bottle.
Check the neck size and threading; you don’t want any whisky whispering out!
Next, ponder over the spray pattern options—do you need a fine mist or a steady stream to suit your project?
Nozzle Compatibility Check
Selecting the right spray nozzle is essential to guarantee your Jack Daniels spray bottle works effectively and efficiently. First, check the threading compatibility.
You wouldn’t want your nozzle to wobble or leak, so it’s vital to confirm the threads on the nozzle match those on your bottle. If you’re unsure, take your bottle to a hardware store and test a few nozzles.
Next, consider the material of the nozzle. Opt for a durable, rust-resistant material like brass or high-grade plastic, which will withstand frequent use and avoid contaminating your liquids.
Spray Pattern Options
Once you’ve confirmed the nozzle fits your Jack Daniels bottle, consider the variety of spray patterns available to tailor your spraying needs efficiently.
Selecting the right spray pattern can enhance both the effectiveness and elegance of your task, whether you’re misting plants or cleaning surfaces.
Here’s a quick guide to help you choose:
| Pattern Type | Best Use |
|---|---|
| Fine Mist | Watering delicate plants |
| Stream | Targeted cleaning |
| Flat Spray | Covering large areas quickly |
| Cone Spray | Distributing liquids evenly |
| Full Spray | General watering and cleaning |
Each pattern serves a unique purpose, ensuring you deliver just the right touch of care and attention to every detail of your service.
Attaching the Nozzle
To attach the nozzle, carefully thread it onto the top of your Jack Daniels bottle, guaranteeing a snug fit to prevent any leaks. You’ll want to make sure it’s all set to serve its new purpose flawlessly.
Here are the steps to make sure you’ve got it just right:
- Align the Nozzle: Make certain the threads of the nozzle align perfectly with those on the bottle. Misalignment can cause cross-threading which might ruin your setup.
- Twist Gently: Rotate the nozzle clockwise. Feel for any resistance if it feels too tight, backtrack slightly, realign, and continue.
- Check Stability: Give it a gentle tug to ensure it’s securely attached. It should feel firm and not wobble or rotate freely.
Now, you’re all set to go!
Sealing for Leaks
Now that the nozzle is attached, it’s important to make sure there are no leaks by applying a waterproof sealant around the connection.
First, choose a high-quality silicone sealant, known for its durability and flexibility. You’ll want to gently squeeze a thin bead of sealant directly where the bottle’s neck meets the nozzle.
Smooth this out with a small, damp finger or a crafting tool, ensuring it’s evenly distributed without any gaps. Allow this to cure for the time specified on the sealant’s packaging—usually around 24 hours.
This step is vital for preventing any embarrassing drips or unwanted messes during use, ensuring you can serve others with efficiency and grace.
Customizing Your Bottle
With your bottle now leak-proof, let’s add a personal touch by customizing its appearance to reflect your style.
Here are three creative ways to make your bottle uniquely yours:
- Paint it Up: Choose acrylic paints or spray paints that complement your decor. Consider matte black for a sleek look, or go bold with metallics. Tape off sections for geometric designs, or freehand a design that speaks to you.
- Add Decals: Select vinyl decals that resonate with your personality or the theme of the room where you’ll use the bottle. Floral patterns, quotes, or even classic bar motifs can add a sophisticated touch.
- Accessorize: Wrap the neck with colored twine or leather strips. Hang charms or beads that dangle attractively when the bottle is in use, giving it an artisanal flair.
Usage and Maintenance Tips
Maintain your custom Jack Daniels spray bottle in top condition by following these essential usage and maintenance tips.
First, always rinse it out after each use, especially if you’re switching between different liquids. This prevents any residue build-up which can clog the nozzle.
For a deep clean, fill the bottle with a mixture of warm water and mild dish soap. Give it a good shake and let it sit for a few minutes before rinsing thoroughly.
Don’t forget to clean the spray nozzle too; soaking it in the same solution can help remove any blockages.
Dry the bottle completely before refilling to avoid any water spots.
With these simple steps, you’ll guarantee your spray bottle serves you well for years to come.
Conclusion
Just like a seasoned gardener knows each spritz from their trusted spray bottle helps their garden flourish, your newly crafted Jack Daniels spray bottle stands ready to nurture your projects.
Tend to your crafts with the same care and precision. Remember, regular maintenance guarantees longevity, much like pruning helps plants thrive.
Embrace each use as an opportunity to refine your skills, guaranteeing your creative garden blooms beautifully. Happy spraying, and let your imagination grow wildly!

