Convert Water Bottle to Hydration System: A Complete Guide!
Transform your standard water bottle into an efficient hydration system with a few easy steps. First, choose a durable, leak-proof bottle, preferably BPA-free plastic or stainless steel, with a capacity of 1 to 2 liters and a wide mouth.
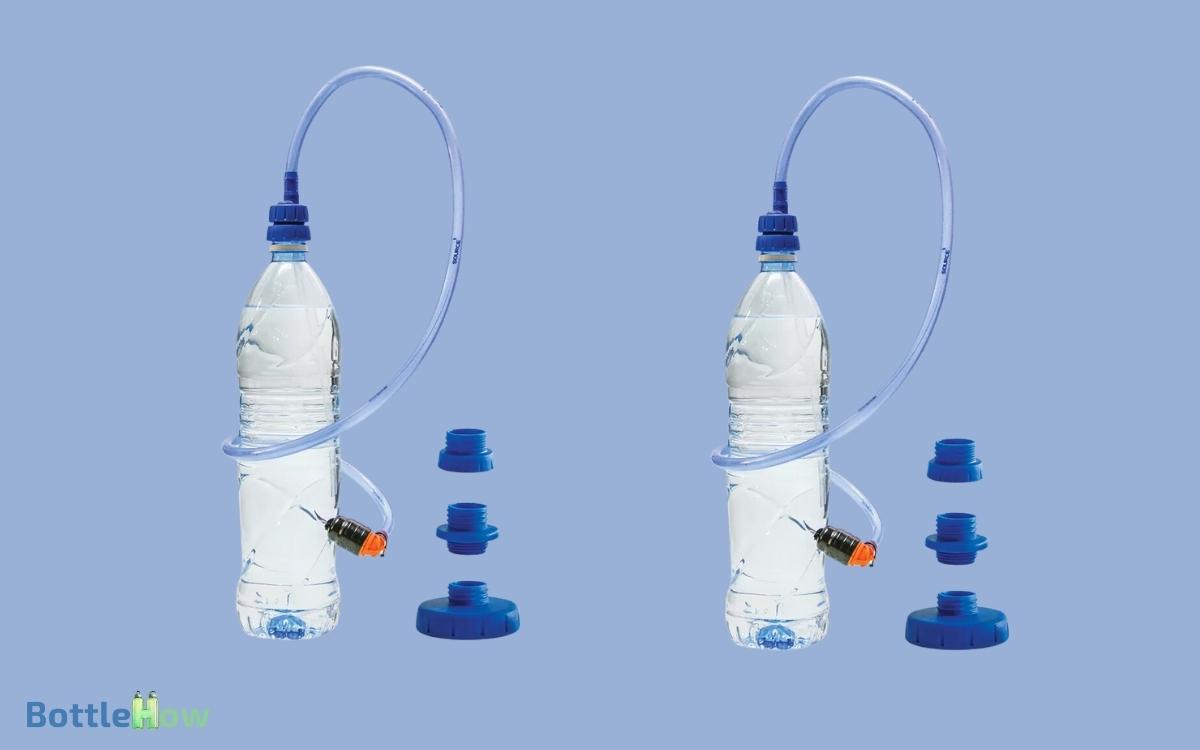
Gather your supplies: a hydration tube kit, a drill, and a grommet. Drill a precise hole in the bottle cap and smoothly insert the hydration tube, securing it with food-safe silicone if needed.
Attach the bite valve to the tube, ensuring a tight fit. Test for leaks and adjust the fit. Keep going to discover more tips for optimizing your hydration system.
Key Takeaways
Choose the Right Bottle
Often, selecting the appropriate bottle is important to effectively transforming it into an efficient hydration system.
Start by choosing a bottle that’s durable and leak-proof. Opt for one made of BPA-free plastic or stainless steel, making sure it’s lightweight yet sturdy.
The bottle should have a wide mouth, making it easier to insert a hydration tube and clean. Capacity matters; aim for at least 1 to 2 liters to guarantee ample water supply. Additionally, consider bottles with measurement markings, which help monitor fluid intake.
Compatibility with standard hydration accessories is essential, so verify the bottle’s size and shape.
Finally, select a bottle with a secure lid to prevent spillage during outdoor activities. This thoughtful selection lays the foundation for a reliable hydration system. Additionally, a well-designed 5 gallon water bottle stand can further enhance convenience by providing a stable and accessible way to dispense water. This stand ensures that large bottles remain upright and easy to use, reducing the risk of tipping or accidental spills. By considering both a secure lid and a sturdy stand, you can create a hassle-free hydration setup for any activity.
Gather Necessary Supplies
You’ll need to gather a few essential supplies to convert your water bottle into a functional hydration system.
First, get a hydration tube kit, which includes a food-grade silicone tube and a bite valve. Confirm the tube fits your bottle’s mouth diameter.
Next, get a drill or a sharp awl to create a hole in your bottle cap for the tube. You’ll also need a grommet to secure the tube and prevent leaks.
Consider a tube cleaning brush for maintenance. Optionally, a tube insulator can keep your water cool.
Install the Hydration Tube
To start installing the hydration tube, first, drill a precise hole in your water bottle cap to match the tube’s diameter. Use a drill bit that corresponds to the external diameter of the hydration tube for a snug fit.
After drilling, smooth the edges of the hole to prevent any damage to the tube. Insert the hydration tube through the hole until it extends into the bottle about an inch. Guarantee the tube sits tightly in the hole to avoid leaks.
If the fit isn’t tight enough, apply a food-safe silicone sealant around the tube entry point. Allow the sealant to dry fully before using the system. This ensures a secure connection and prevents any water from escaping.
Secure the Bite Valve
With the hydration tube securely in place, attach the bite valve to the end of the tube to guarantee a controlled water flow.
Push the bite valve firmly onto the tube until it fits snugly. Make sure there are no gaps between the valve and the tube to prevent leaks.
Some bite valves come with a locking mechanism; if yours does, engage it to guarantee stability.
Rotate the valve to check for a secure fit. Consider using a small clamp or zip tie around the connection point for added security.
Verify that the bite valve opens and closes smoothly by pinching and releasing it. Properly securing the bite valve is essential for efficient hydration and avoiding any potential leaks during use.
Test and Adjust
Begin by filling the converted water bottle with clean water and holding it upright to check for any immediate leaks.
Inspect the connections, guaranteeing the hose is securely attached to both the bottle and the bite valve. If you notice any drips, tighten the fittings or apply additional sealant as needed.
Next, test the flow by gently biting on the valve and sucking. Water should flow smoothly and without resistance. If the flow is weak or obstructed, adjust the hose positioning or check for kinks. Verify that the bite valve opens and closes properly to prevent accidental spills.
Lastly, wear the hydration system to confirm comfort and ease of access. Make any necessary adjustments to the hose length or valve placement for optimal use.
Conclusion
You’ve now transformed your ordinary water bottle into a high-performance hydration system.
With the right bottle, the necessary supplies, and a bit of elbow grease, you’re ready to tackle any adventure.
Just like a well-oiled machine, your new setup will keep you hydrated and moving efficiently.
Remember, the devil’s in the details—ensure everything’s secure and functioning before you hit the trails.
Now, drink up and let your journey flow as smoothly as your hydration system!

