How to Remove Mold From Rubber Seal on Water Bottle
To remove mold from the rubber seal on your water bottle, start by disassembling the bottle to access all parts. Soak the rubber seal in warm water for 15-20 minutes to loosen the mold.
Apply a vinegar-baking soda solution and scrub with a small brush to dislodge mold particles. Rinse the seal thoroughly with warm water and dry it completely using a microfiber cloth or air drying in a well-ventilated area.
Reassemble the bottle, ensuring all parts are dry. Regularly clean and dry the seal to prevent mold from returning.
For additional details and tips, keep going.

Key Takeaways
- Soak the components in warm water for 15-20 minutes to loosen mold and grime.
- Apply a mold removal solution, such as white vinegar, ensuring complete coverage of the rubber seal.
- Scrub the rubber seal with a soft-bristled brush to dislodge mold particles, focusing on edges and folds.
- Rinse the rubber seal thoroughly with warm water to remove all cleaning agents and mold residues.
Identify the Mold
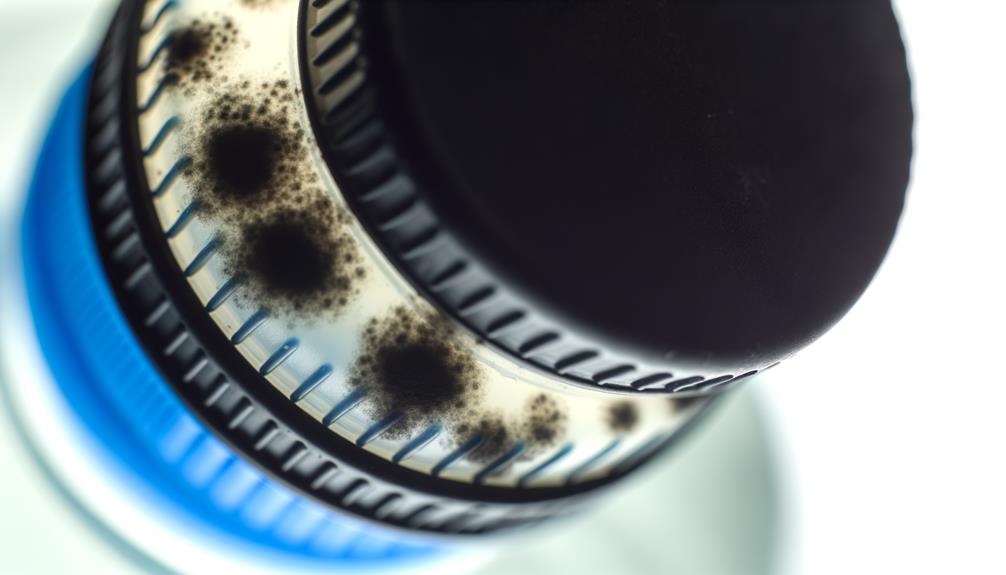
To identify mold on the rubber seal of your water bottle, look for dark spots, discoloration, or a musty odor. Mold often appears as black, green, or white patches.
You'll want to check around the edges and any grooves in the seal, as mold thrives in damp, enclosed spaces. Don't just rely on sight; the musty smell is a strong indicator of mold presence.
Carefully inspect and sniff the seal, ensuring you don't miss any hidden spots. Your vigilance here is essential because mold can affect your health and the taste of your water.
Gather Cleaning Supplies
Start by collecting essential cleaning supplies like white vinegar, baking soda, a small brush, a microfiber cloth, and warm water.
White vinegar is a natural disinfectant that effectively kills mold spores. Baking soda helps to scrub away stubborn mold and neutralizes odors.
A small brush, like an old toothbrush, allows you to reach into tight spaces and crevices of the rubber seal. Microfiber cloths are gentle on surfaces and won't leave scratches.
Warm water helps to loosen up debris and makes cleaning more efficient.
Disassemble the Bottle

Carefully take apart your water bottle, guaranteeing you separate the lid, rubber seal, and any other detachable components.
By doing this, you'll expose all areas that could harbor mold. Start by twisting off the lid, then gently remove the rubber seal. If your bottle has additional parts like straws or spouts, detach those as well.
This thorough disassembly is vital because mold often hides in hard-to-reach places. Don't rush this step; taking your time minimizes the risk of damaging any components.
Each part needs to be individually cleaned to make certain no mold spores are left behind. You're not just cleaning a bottle; you're safeguarding your health and making sure that every sip you take is safe and invigorating.
Soak in Warm Water
Once you've disassembled the bottle, immerse all the components in a basin of warm water to loosen any mold and grime.
Warm water helps to soften the residue, making it easier to remove in the subsequent steps. Make sure the water isn't too hot, as excessive heat can damage rubber seals and other parts.
Let the pieces soak for at least 15-20 minutes. This step is essential because it preps the surfaces, allowing cleaning agents to penetrate better.
While the parts are soaking, you can gently agitate the water to help dislodge some of the debris. By taking this time to soak, you're creating an environment where the mold and grime can be more effectively cleaned away, fostering a sense of cleanliness and care in your community.
Apply Cleaning Solution
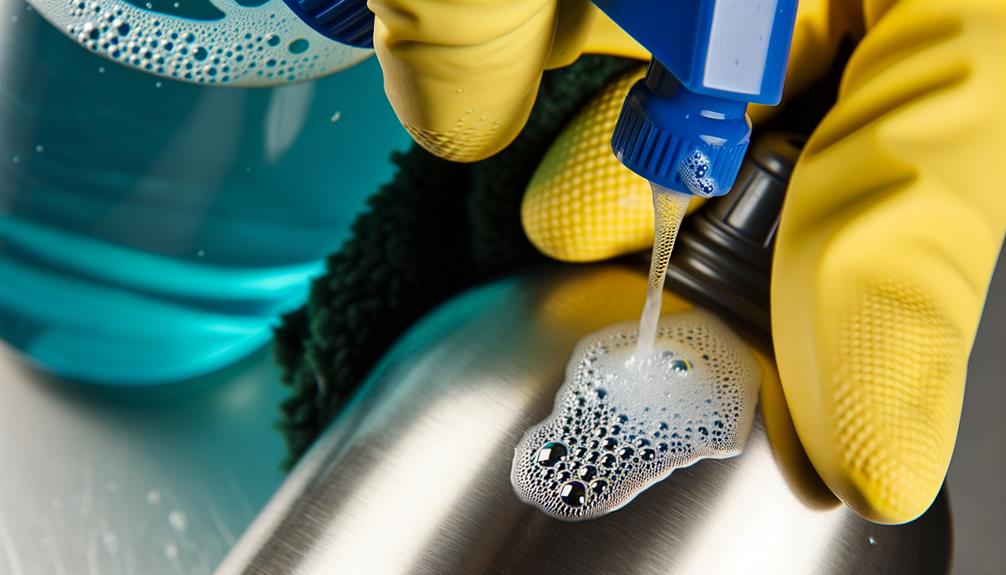
With the components thoroughly soaked, apply a cleaning solution specifically designed for mold removal directly onto the rubber seal.
You'll want to guarantee the solution covers all affected areas. Choose a product that's safe for use on rubber and food-contact surfaces. Be certain to follow the manufacturer's instructions for dilution and application. This will help you achieve the best results without damaging the seal.
It's crucial to let the cleaning solution sit for the recommended time, usually around 10-15 minutes, to effectively break down the mold. This period allows the solution to penetrate deeply into any crevices.
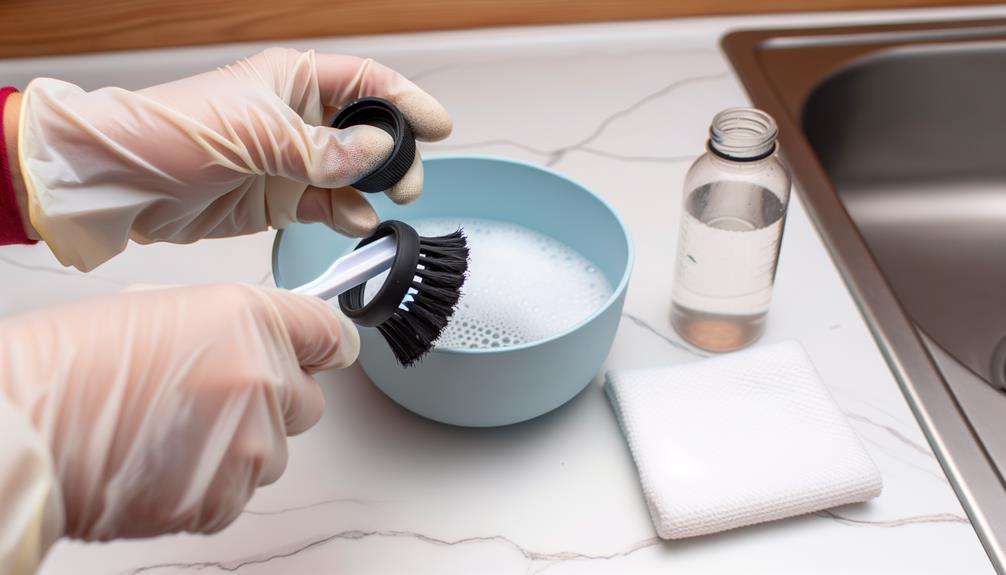
Scrub the Rubber Seal
Use a small, soft-bristled brush to scrub the rubber seal, guaranteeing you reach into all grooves and crevices where mold may be hiding.
Gently but thoroughly move the brush in circular motions to dislodge mold particles. Pay attention to the edges and folds of the seal, as mold often thrives in these hidden spots.
You might notice some discoloration, which indicates mold residue being lifted. Be patient and methodical, making sure every part of the seal gets attention.
If the mold is stubborn, apply a bit more cleaning solution to the brush and continue scrubbing.
This careful approach guarantees you're not just cleaning but restoring the integrity of your water bottle's rubber seal, contributing to a healthier hydration experience.
Rinse Thoroughly
After scrubbing, rinse the rubber seal thoroughly with warm water.
Make certain to use a brush to dislodge any remaining mold particles.
This step guarantees all cleaning agents and mold residues are completely washed away.
Use Warm Water
Rinse the rubber seal thoroughly with warm water to help loosen and remove any visible mold.
Warm water is more effective than cold because it can break down mold spores and residues, making them easier to wash away.
Hold the seal under running warm water for at least 30 seconds, ensuring that all sides are exposed to the stream.
Rotate the seal to reach every nook and cranny, as mold often hides in crevices.
You might feel more connected to this process knowing it's a common practice among those committed to health and cleanliness.
Scrub With Brush
Grab a soft-bristled brush and start scrubbing the rubber seal to dislodge any stubborn mold residues. Ascertain you reach all the nooks and crannies where mold can hide.
Here's how to do it effectively:
- Apply Cleaning Solution: Dab a bit of your chosen mold-killing solution onto the seal.
- Scrub Gently: Use the brush to scrub in circular motions. This helps lift the mold without damaging the rubber.
- Rinse Thoroughly: After scrubbing, rinse the seal under warm water to remove any remaining cleaning solution and mold particles.
Use a Toothbrush
Start by using a toothbrush with soft bristles to gently scrub the mold off the rubber seal, guaranteeing you reach all the crevices. The bristles are perfect for getting into those tiny gaps where mold loves to hide.
To enhance your scrubbing, dip the toothbrush in a mixture of warm water and a mild detergent or white vinegar. This combination helps break down the mold more effectively. Move the toothbrush in circular motions, providing a thorough clean without damaging the seal.
Be patient and meticulous; your diligence guarantees all mold is removed. Remember, this step isn't just cleaning—it's about reclaiming your water bottle, making it safe for you and your loved ones to use again.
Dry Completely
Make sure you dry the rubber seal completely to prevent mold from returning.
Use a clean cloth or paper towel to absorb excess moisture, and consider placing the seal in a well-ventilated area to air dry. Avoid using direct heat sources, as this may cause warping or damage to the material. Once completely dry, check for any remaining moisture before applying any protective finishes. If you’re looking for tips on how to seal acrylic paint, be sure to choose an appropriate sealant to ensure durability and longevity.
Ensuring thorough drying will help prevent future moisture buildup and mold growth.
Importance of Thorough Drying
Making certain the rubber seal is completely dry is essential to preventing mold regrowth and maintaining the hygiene of your water bottle.
Mold thrives in damp environments, so even a small amount of moisture can lead to contamination. By thoroughly drying the rubber seal, you can make certain that mold spores don't have the chance to proliferate.
Here are three steps to help you make sure the rubber seal is dry:
- Pat Dry with a Clean Towel: Use a clean, absorbent towel to remove as much moisture as possible.
- Air Dry: Leave the rubber seal in an open, dry area with good air circulation.
- Inspect for Moisture: Check for any remaining dampness before reassembling your bottle.
Tools for Effective Drying
To effectively dry the rubber seal on your water bottle, you'll often need specific tools that guarantee all moisture is eliminated. Using the right tools guarantees that every nook and cranny is free from moisture, which is essential to prevent mold growth.
Here's a table of essential tools:
| Tool | Purpose |
|---|---|
| Microfiber Cloth | Absorbs water efficiently |
| Hair Dryer (Cool Setting) | Dries hard-to-reach spots |
| Silica Gel Packets | Absorbs any remaining moisture |
Microfiber cloths are excellent for their absorbency and softness, preventing damage. A hair dryer on a cool setting helps reach tight spaces. Silica gel packets are perfect for absorbing residual moisture. By using these tools, you guarantee a thorough drying process, reducing the likelihood of mold reappearing.
Preventing Future Moisture
For effective prevention of future moisture and mold growth, drying the rubber seal completely is essential. After cleaning, make certain the seal is thoroughly dry before reassembling your water bottle. Moisture left behind is a breeding ground for mold.
Here's how to do it:
- Pat Dry with a Towel: Use a clean, dry towel to absorb as much moisture as possible from the seal.
- Air Dry: Place the seal in a well-ventilated area to air dry completely. Avoid closed spaces, as they trap moisture.
- Use a Hairdryer: For quicker results, use a hairdryer on a low heat setting to eliminate any remaining dampness.
Reassemble the Bottle
After thoroughly drying each component, align the rubber seal and snap it back into the bottle lid securely.
Make certain there's no misalignment; the seal needs to sit perfectly to prevent leaks.
Next, reattach the lid to the bottle. Twist it tightly to guarantee a proper seal.
Double-check for any gaps or loose fittings. This precision helps maintain the bottle's integrity and keeps mold at bay.
If your bottle has additional parts like straws or filters, reassemble them according to the manufacturer's instructions.
A well-assembled bottle not only keeps your drinks fresh but also fosters a sense of accomplishment and care for your belongings.
Regular Maintenance Tips
Maintaining a clean water bottle becomes effortless with regular upkeep, ensuring the rubber seal stays mold-free and your drinks remain safe to consume.
Regular maintenance not only extends the life of your water bottle but also keeps you feeling part of a community that values health and hygiene.
Follow these simple steps:
- Daily Rinse: Rinse the bottle and seal with hot water after every use to remove residue and prevent mold growth.
- Weekly Deep Clean: Soak the bottle and seal in a solution of one part vinegar to three parts water for at least 15 minutes, then scrub and rinse thoroughly.
- Dry Thoroughly: Always let the bottle and seal air-dry completely before reassembling to avoid moisture buildup.
Conclusion
Cleaning mold from your water bottle's rubber seal isn't just about appearance; it's about health.
Imagine a pristine, clear seal juxtaposed against the black, slimy mold you started with.
By identifying the mold, disassembling the bottle, and scrubbing with a toothbrush, you've transformed your bottle back to its original state.
Regular maintenance guarantees this clarity persists, preventing any mold from regaining a foothold.
It's a small effort for a big difference in your hydration routine.